Assignment Management
📍 Class Schedule → Click the class in the timetable → Click [Assignment Management] in the left menu
- Give assignments to students.
- Check who has submitted.
- Grade submissions and leave comments.
- Edit or delete assignments.
Post an assignment
Step 1: Click Add Assignment
Click [+ Add Assignment]. When the class has no assignments yet, the button is in the middle of the page. After you post one, it moves to the top right.
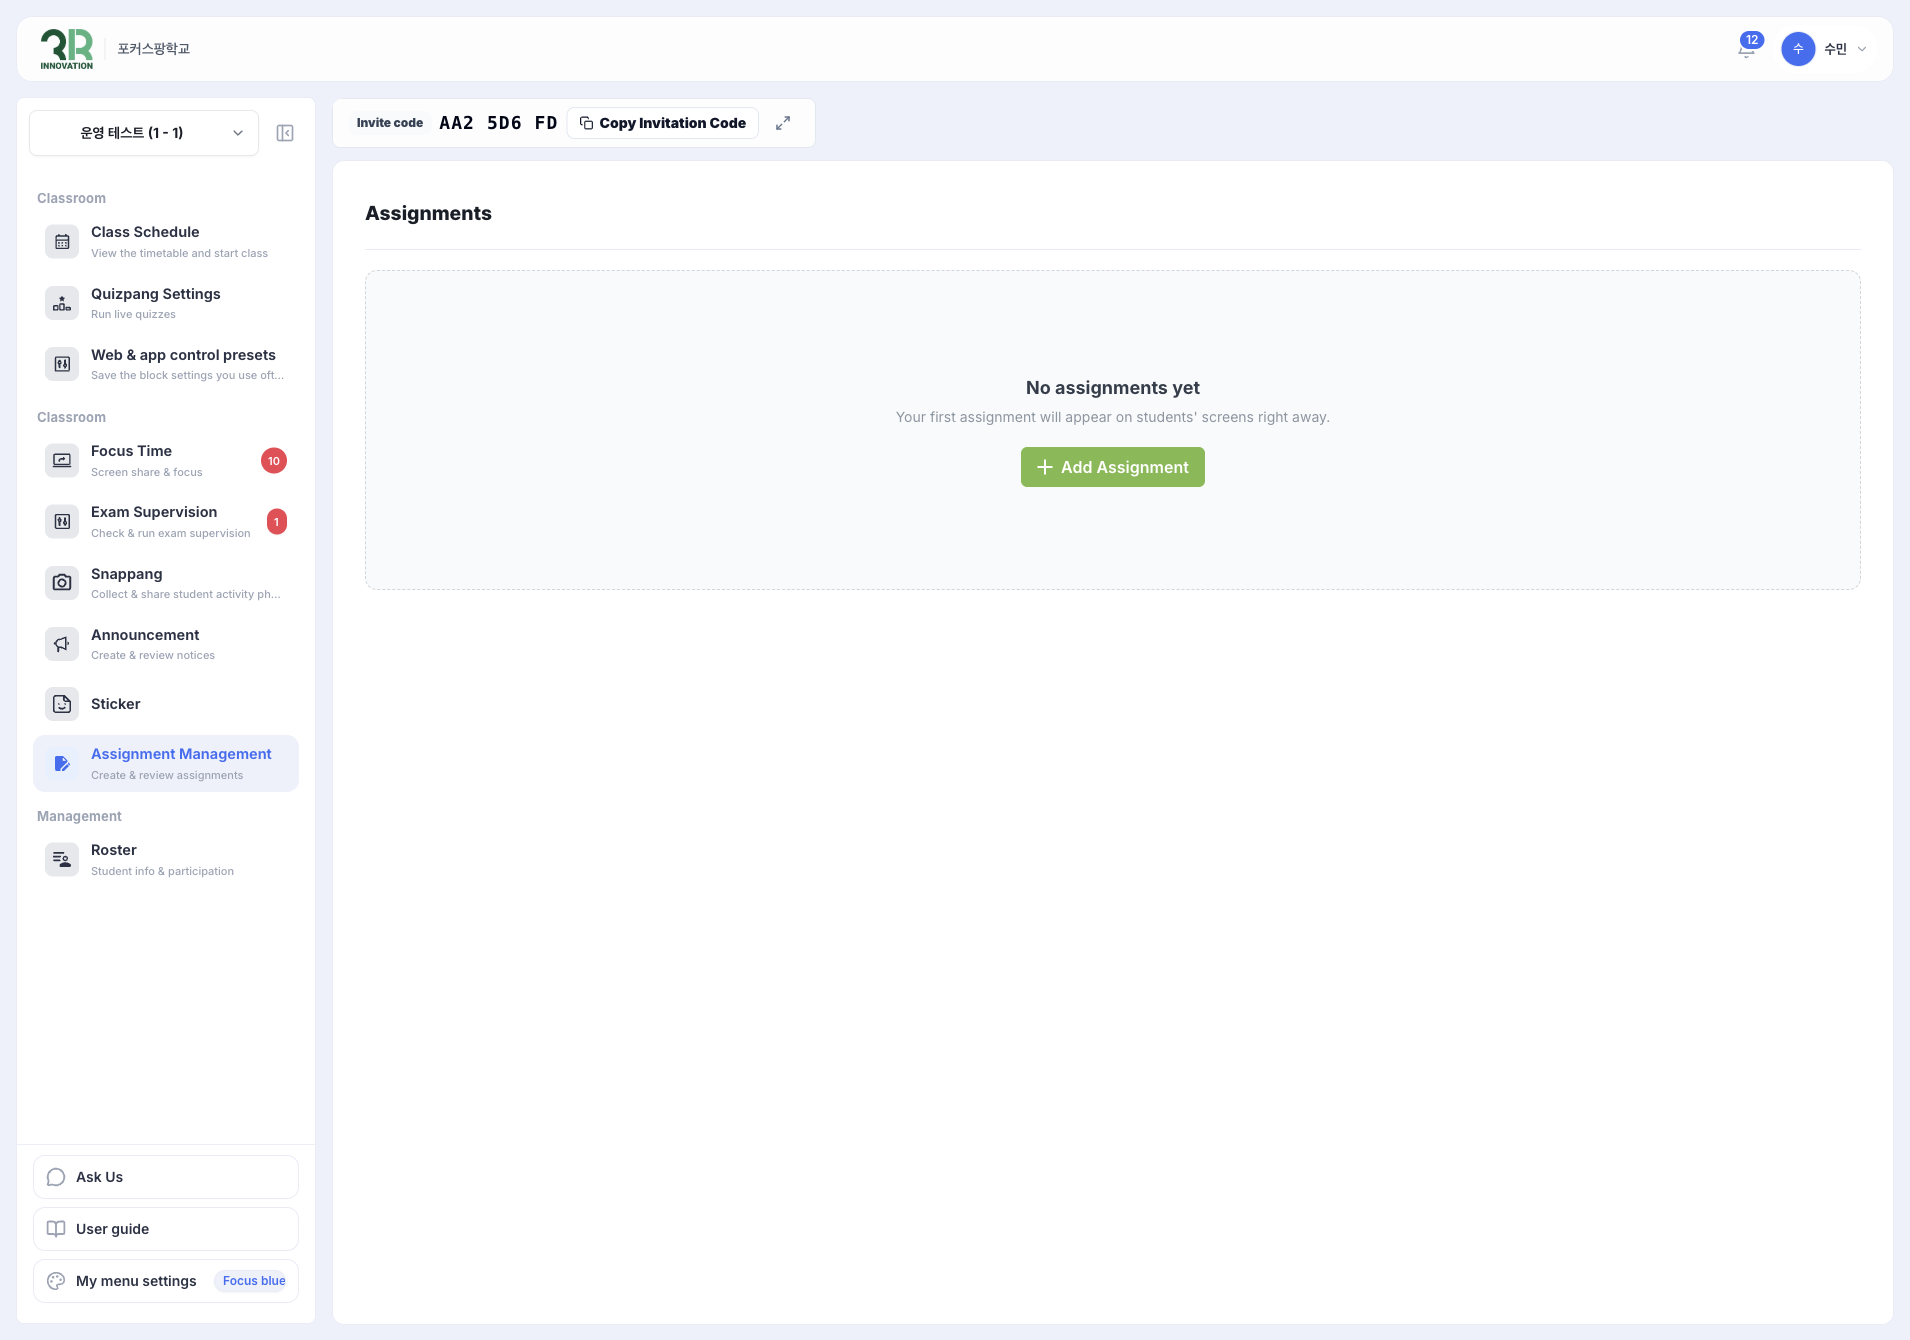
Step 2: Enter the assignment details
On the New Assignment page, fill in the following. Fields marked * are required.
- Title *: The name of the assignment.
- Date and time of assignment release *: Choose Immediately to show it right away, or choose a later date and time.
- Submission deadline *: The date and time students must submit by.
- [+ Add another class]: Post the same assignment to other classes as well.
- Content: Write the instructions in the editor.
- Attachment List: Click [Add File] to attach files.
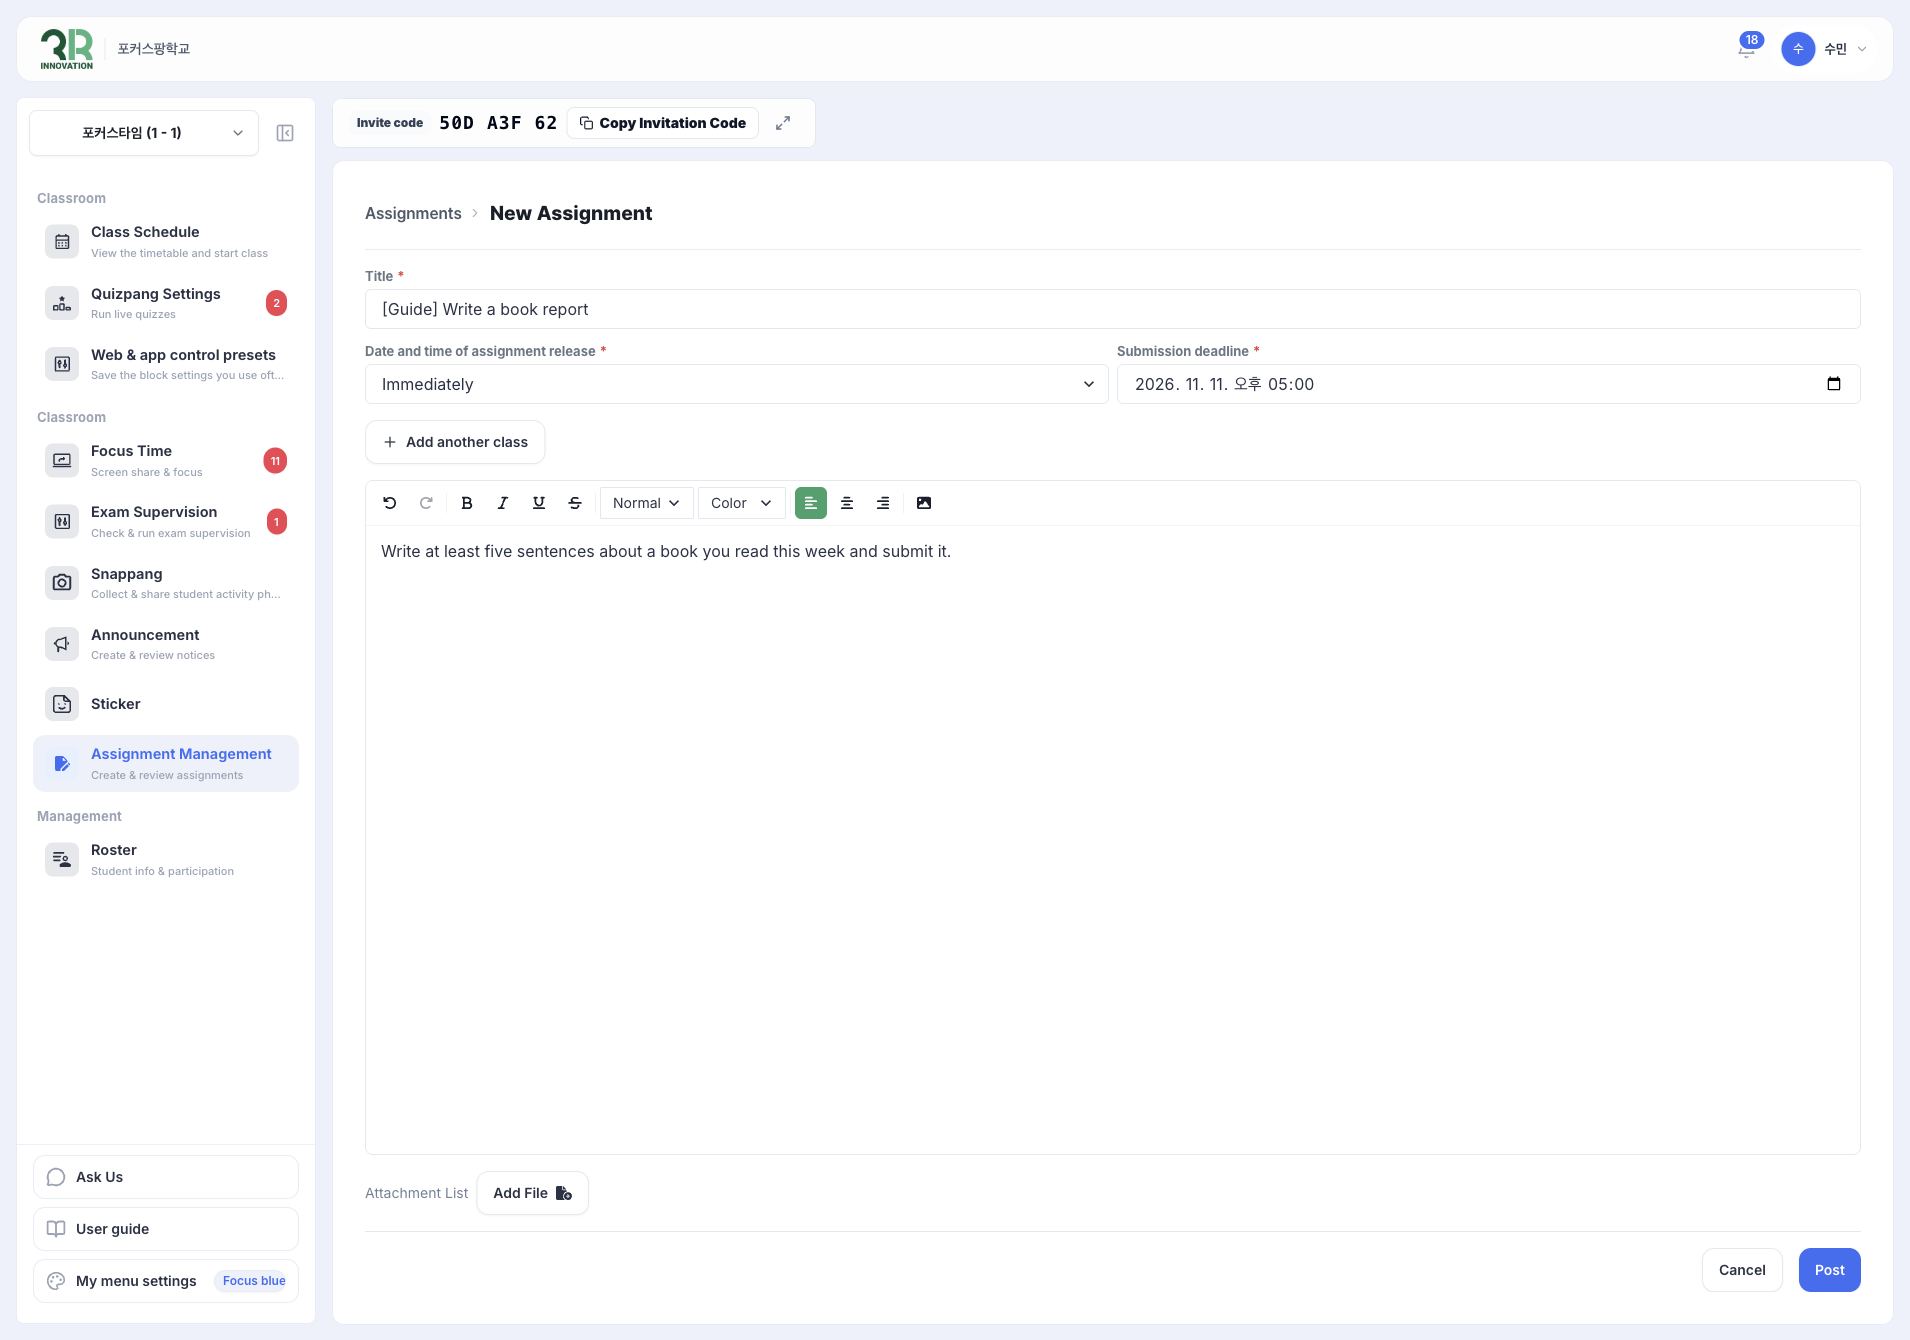
Step 3: Post the assignment
Click [Post]. The message The assignment has been posted. appears, and the assignment is added to the list.
The list shows each assignment’s days left (for example, 7 days left), the Submission deadline and the Completion rate, for example 25% (1/4).
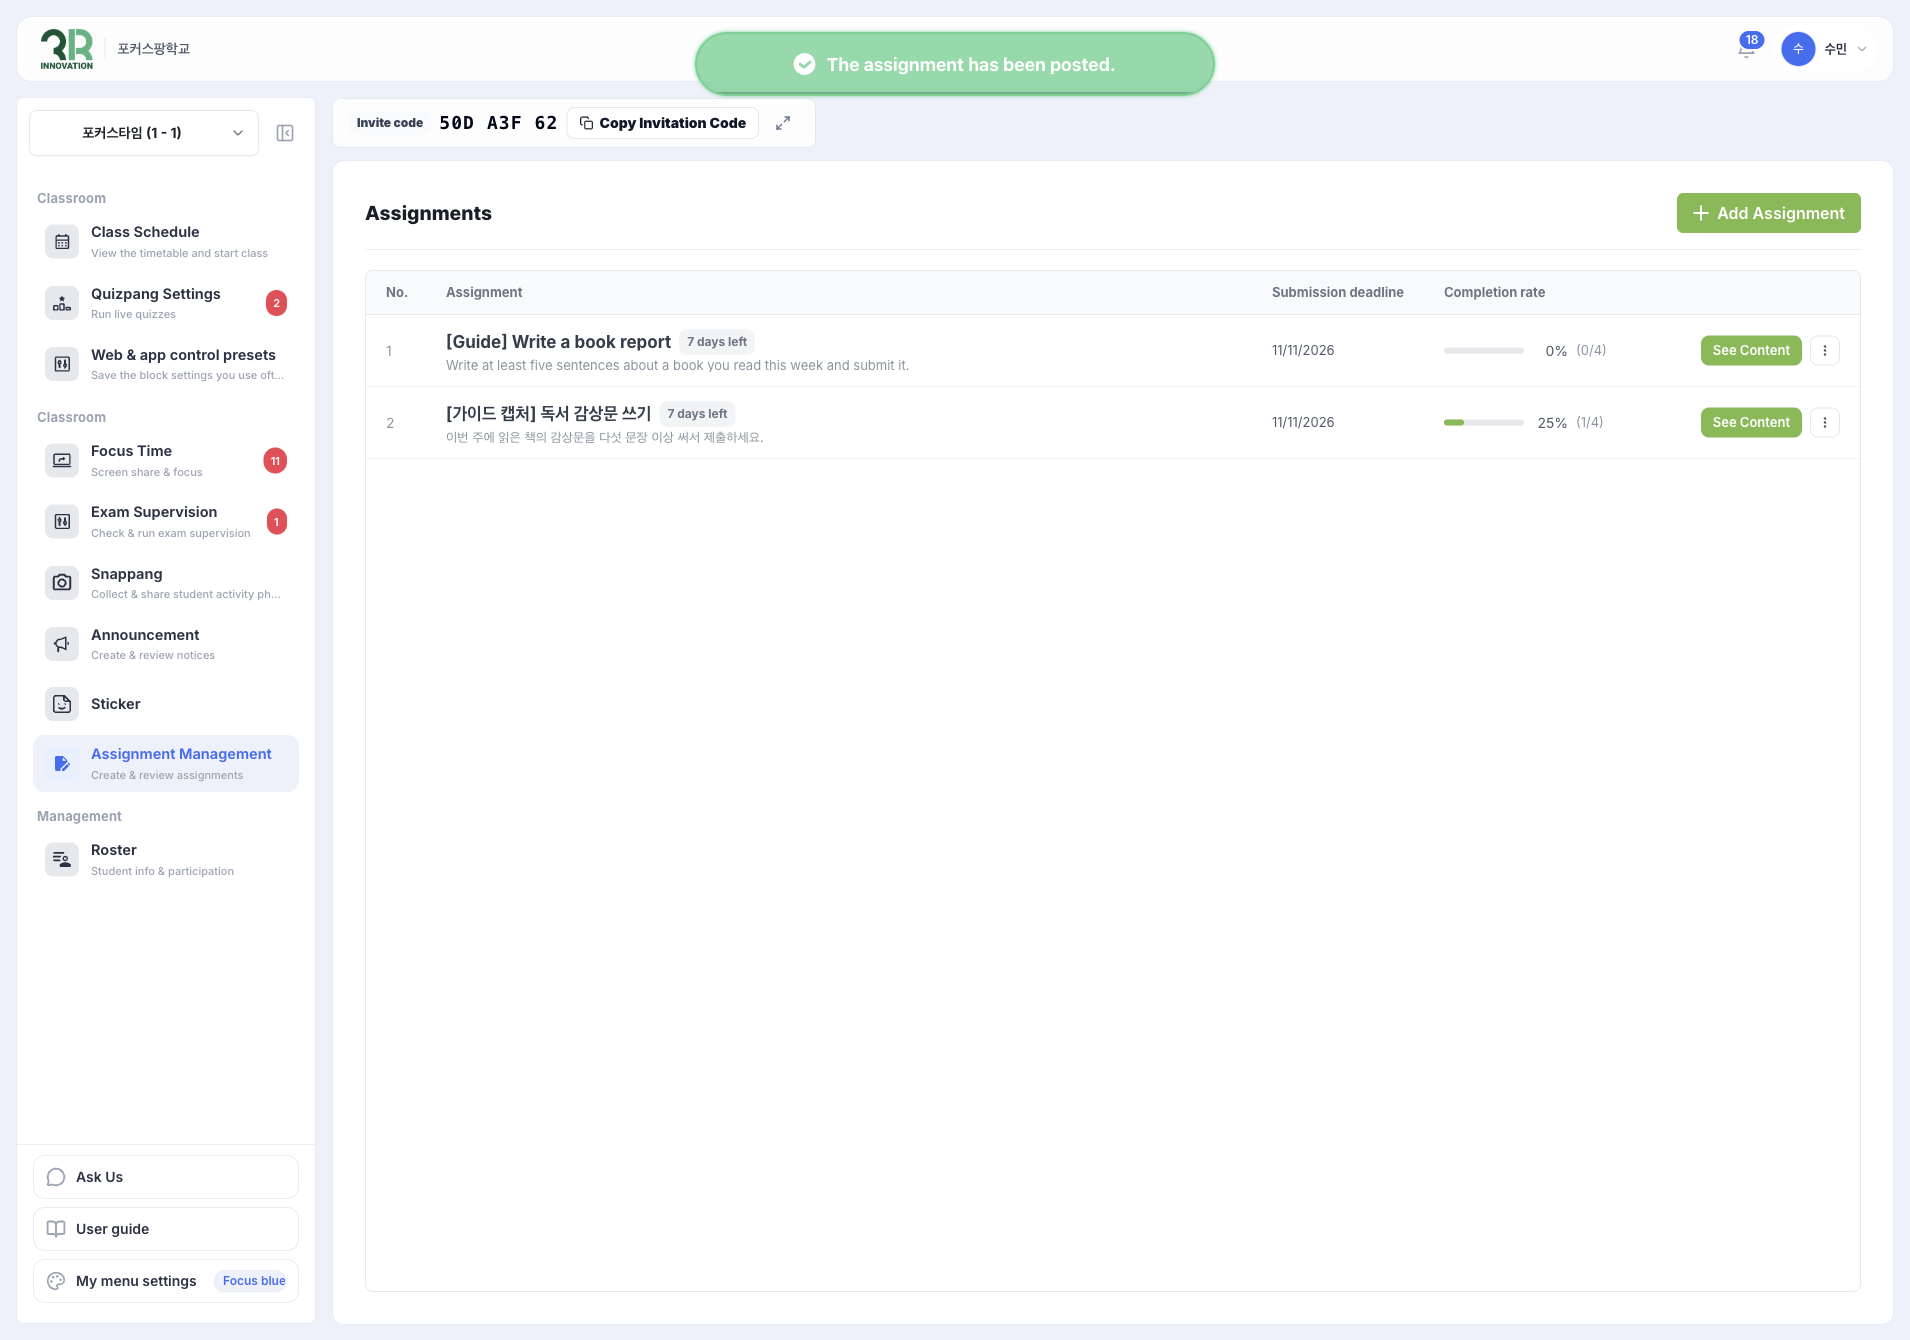
Check submissions and grade
Step 1: Open the assignment
In the list, click [See Content]. The Assignment Details tab shows the instructions, and the panel on the right shows the Release Date, Submission deadline, Submission Status and Attachments.
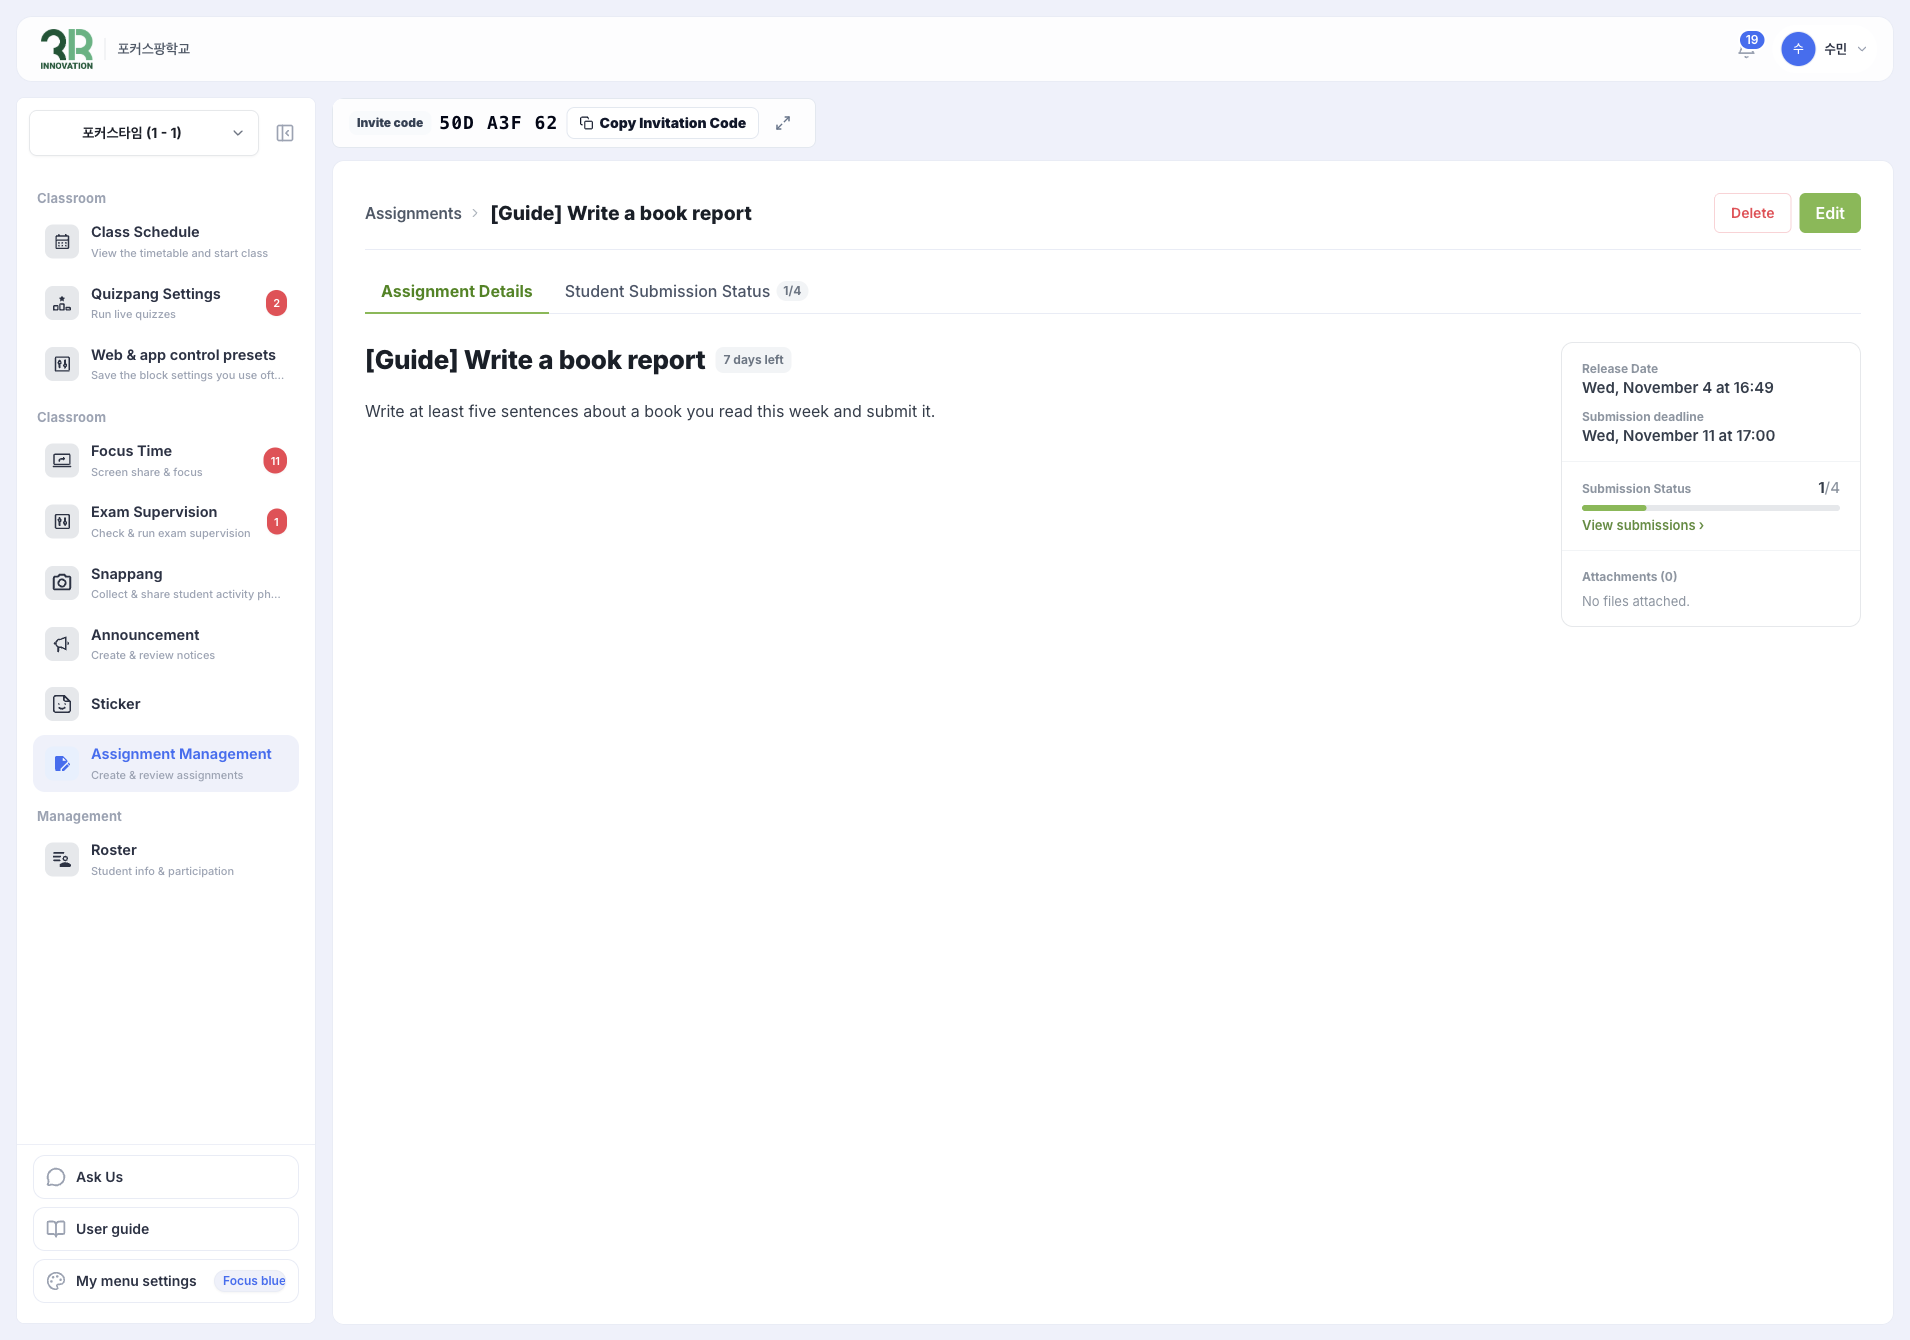
Step 2: See who has submitted
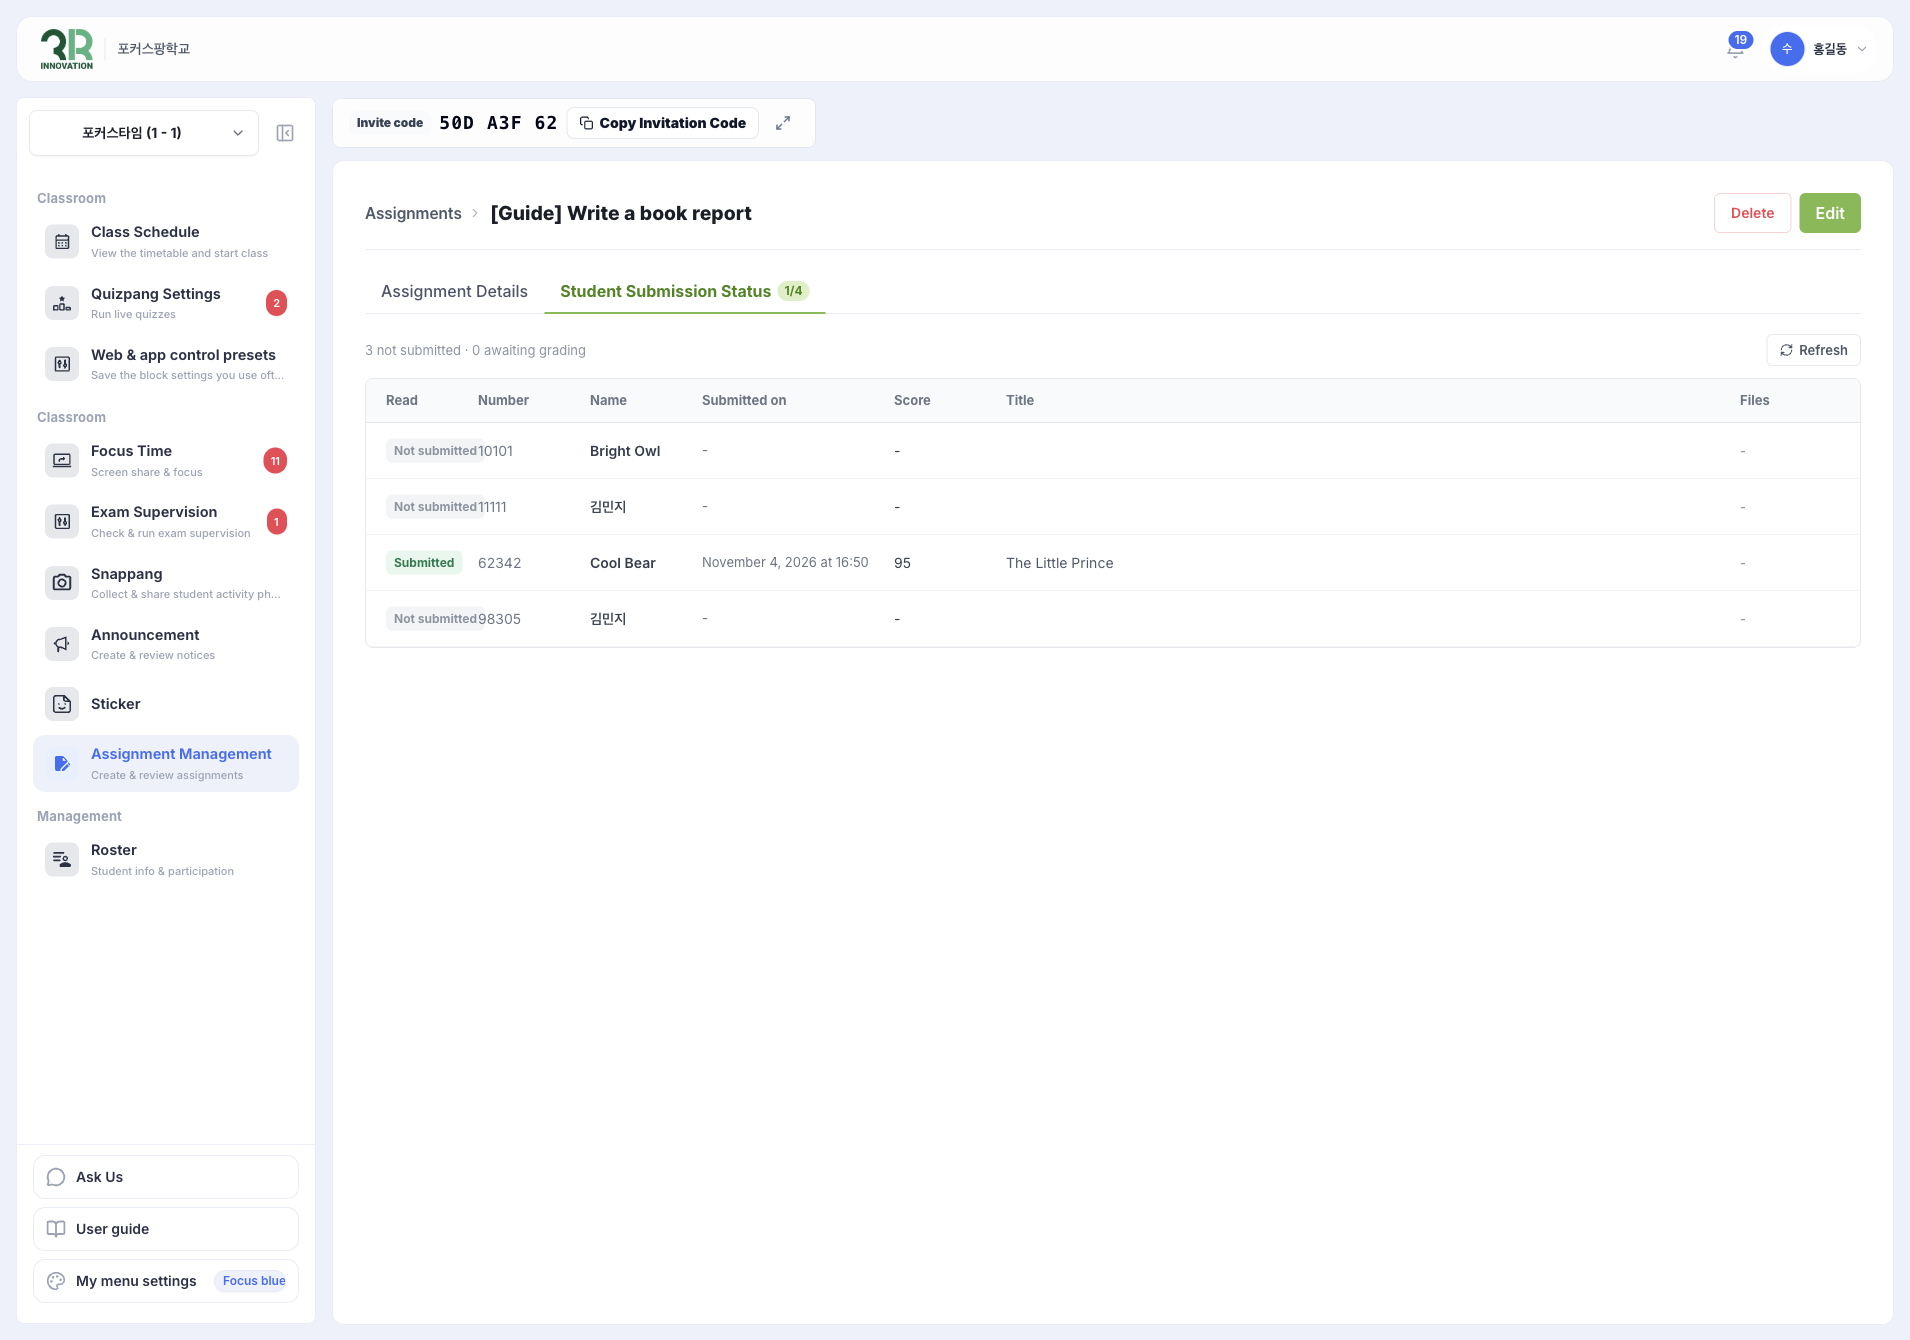
Click the Student Submission Status tab, or View submissions ›. The table shows each student’s status (Submitted or Not submitted), Number, Name, Submitted on, Score, Title and Files. Click [Refresh] to update the list.
Step 3: Grade the submission
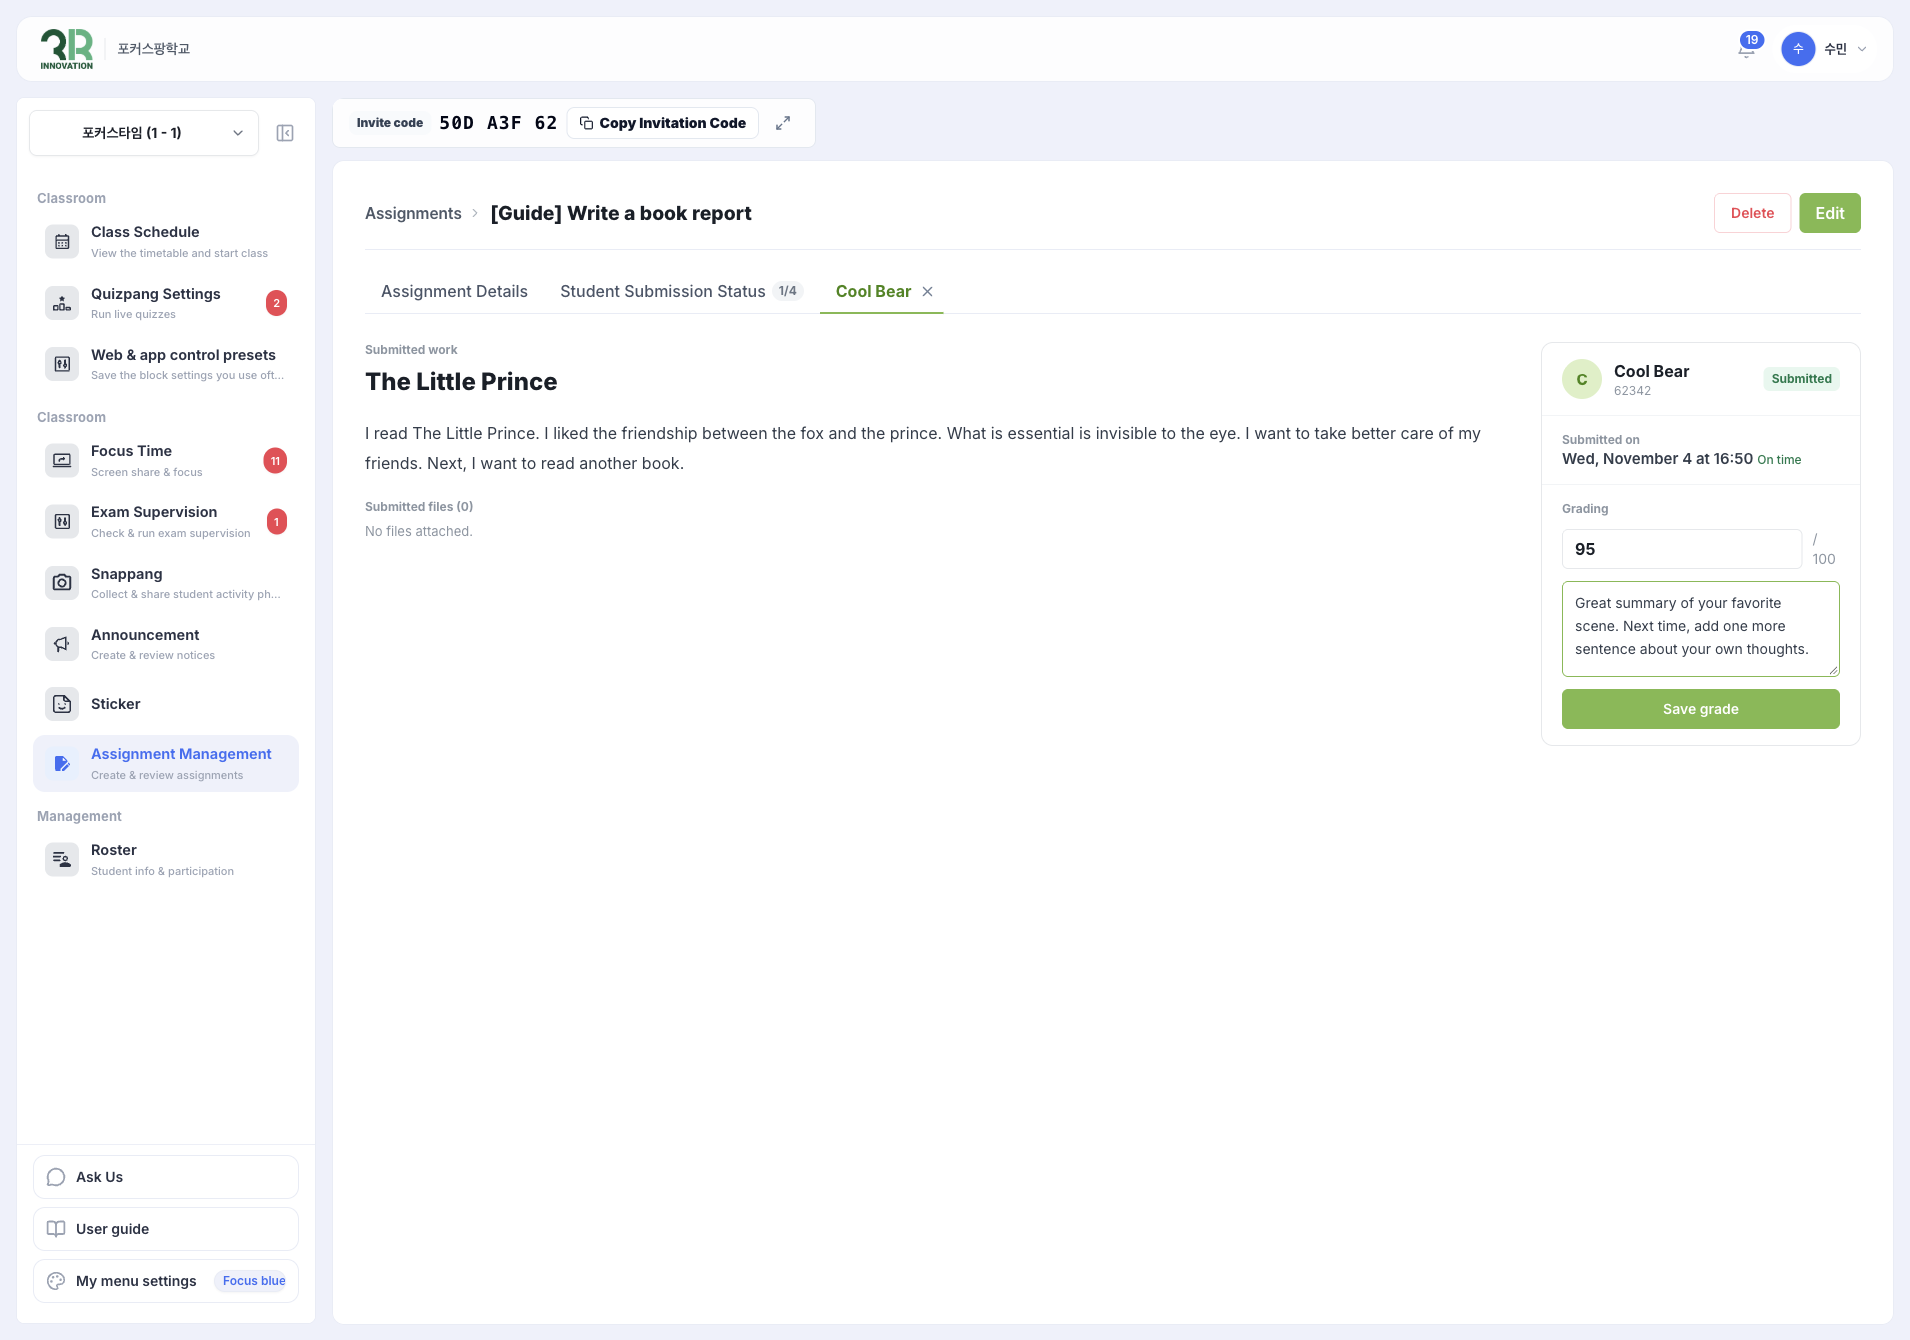
Click a student who has submitted. A tab with the student’s name opens and shows the Submitted work and Submitted files.
In the panel on the right, enter a score out of 100 under Grading and type a comment for the student. Then click [Save grade].
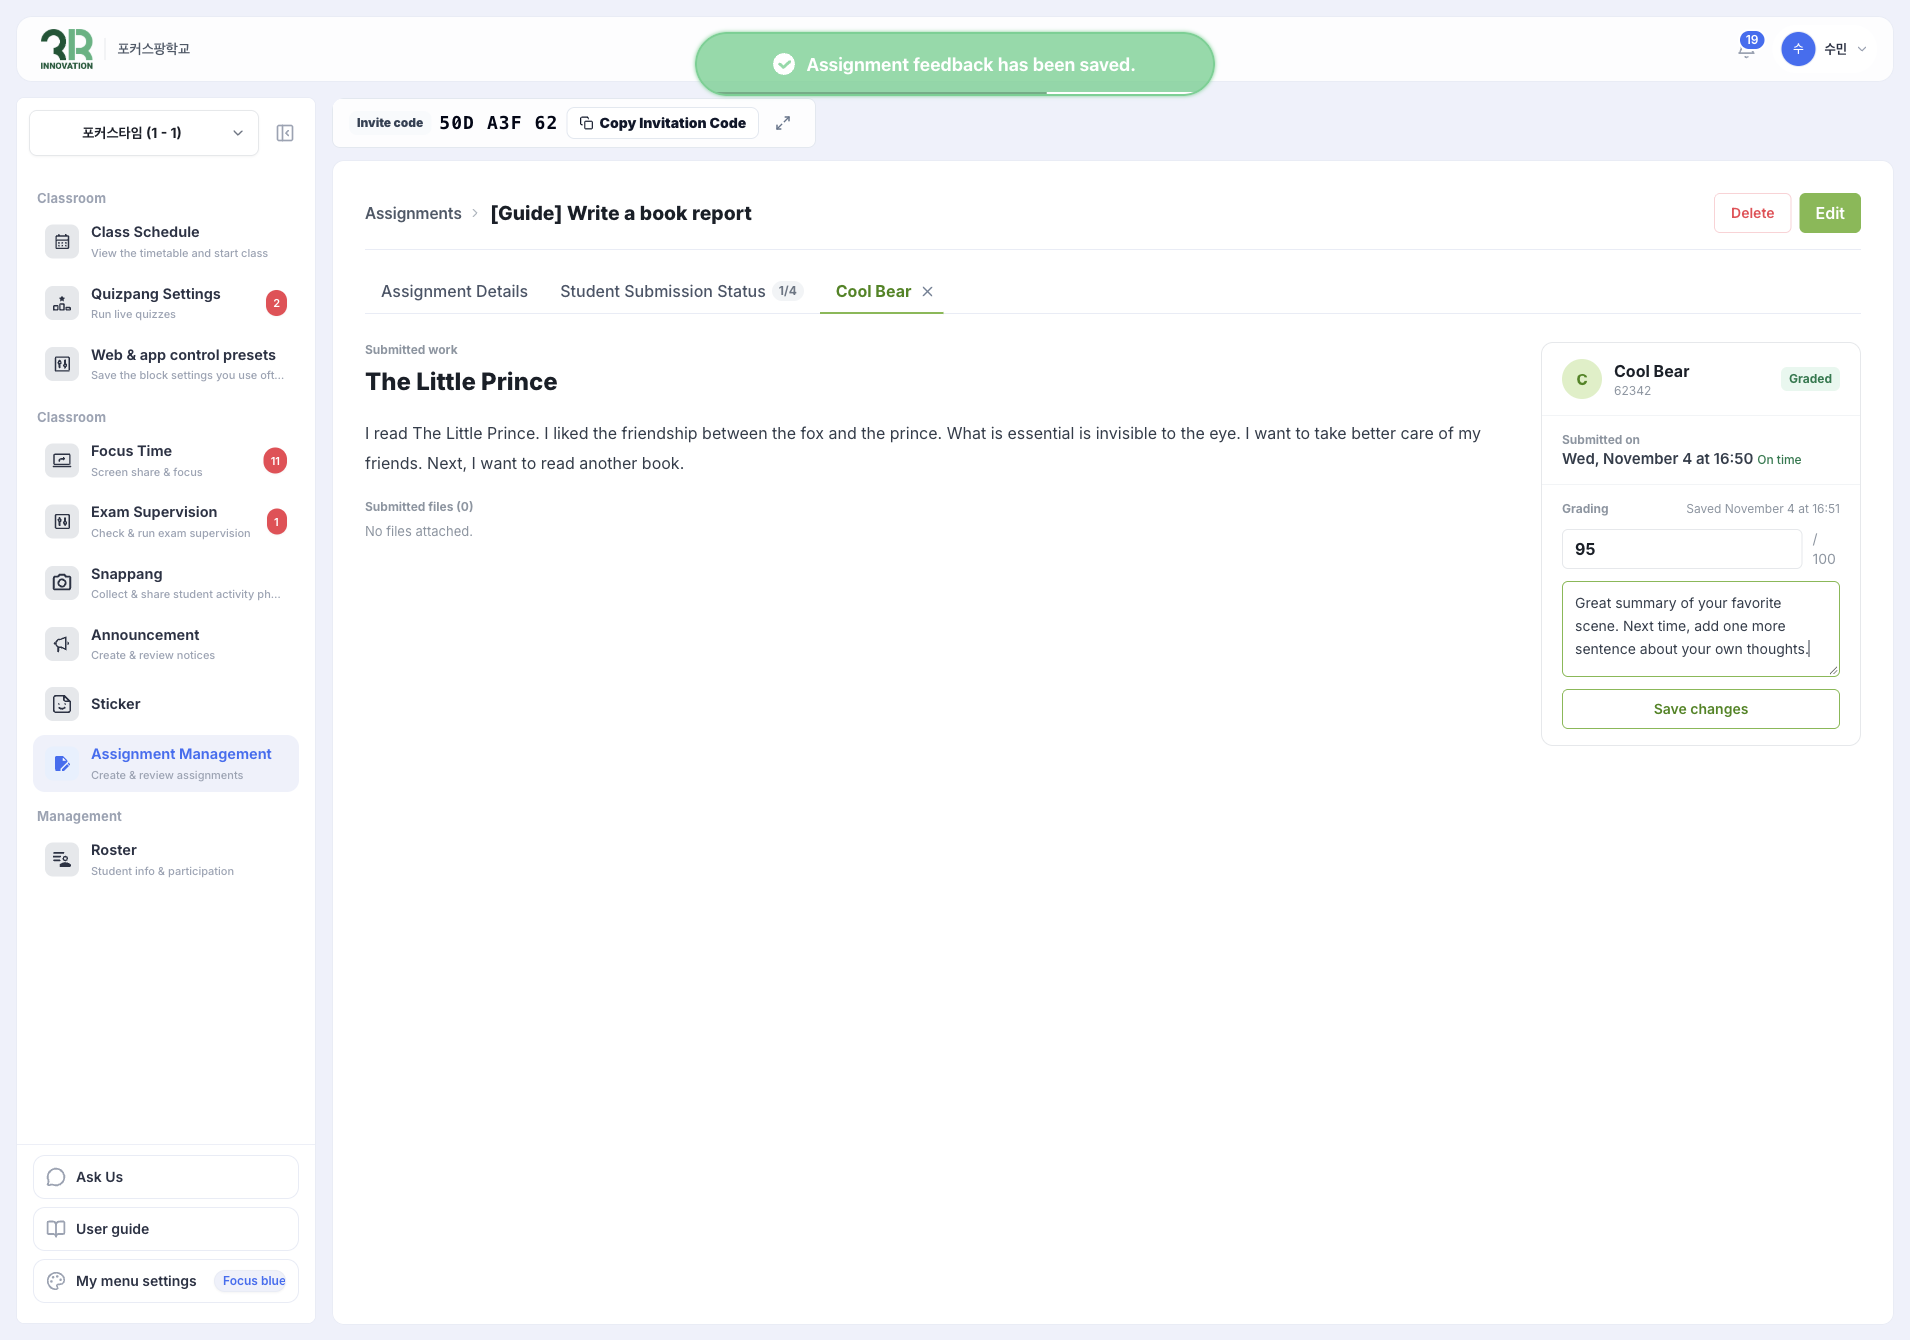
When the grade is saved, the message Assignment feedback has been saved. appears and the student’s status changes to Graded. To change the score or comment later, edit them and click [Save changes].
Edit or delete an assignment
Open the assignment with [See Content].
- Click [Edit] to change the assignment.
- Click [Delete] to remove the assignment.