Homeroom Teacher
Creating a Class
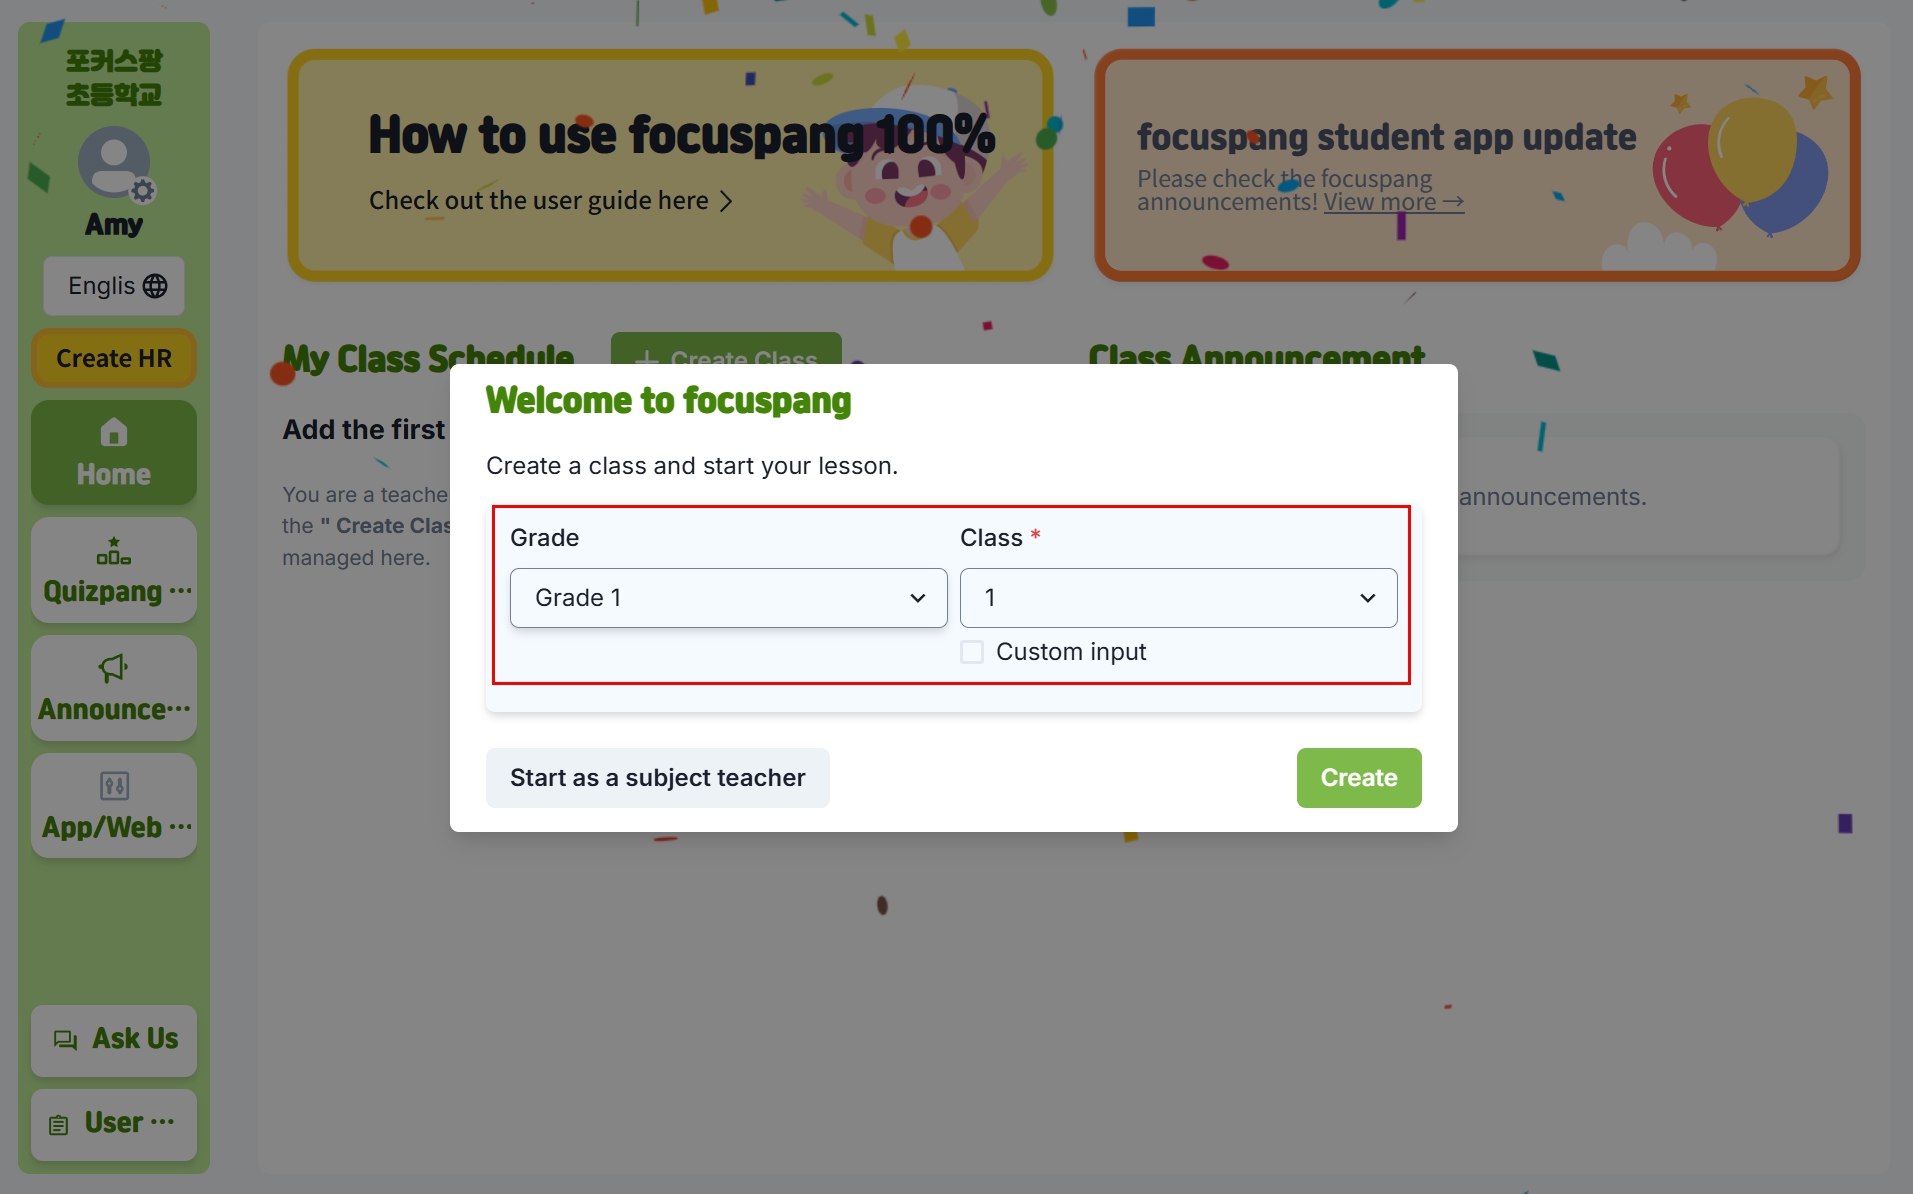
Step 1: Select grade and class
- First, select your grade
- Next, choose the class. If the class is not a number (e.g., “Love Class,” “Hope Class”), check Enter your own and type the class name.
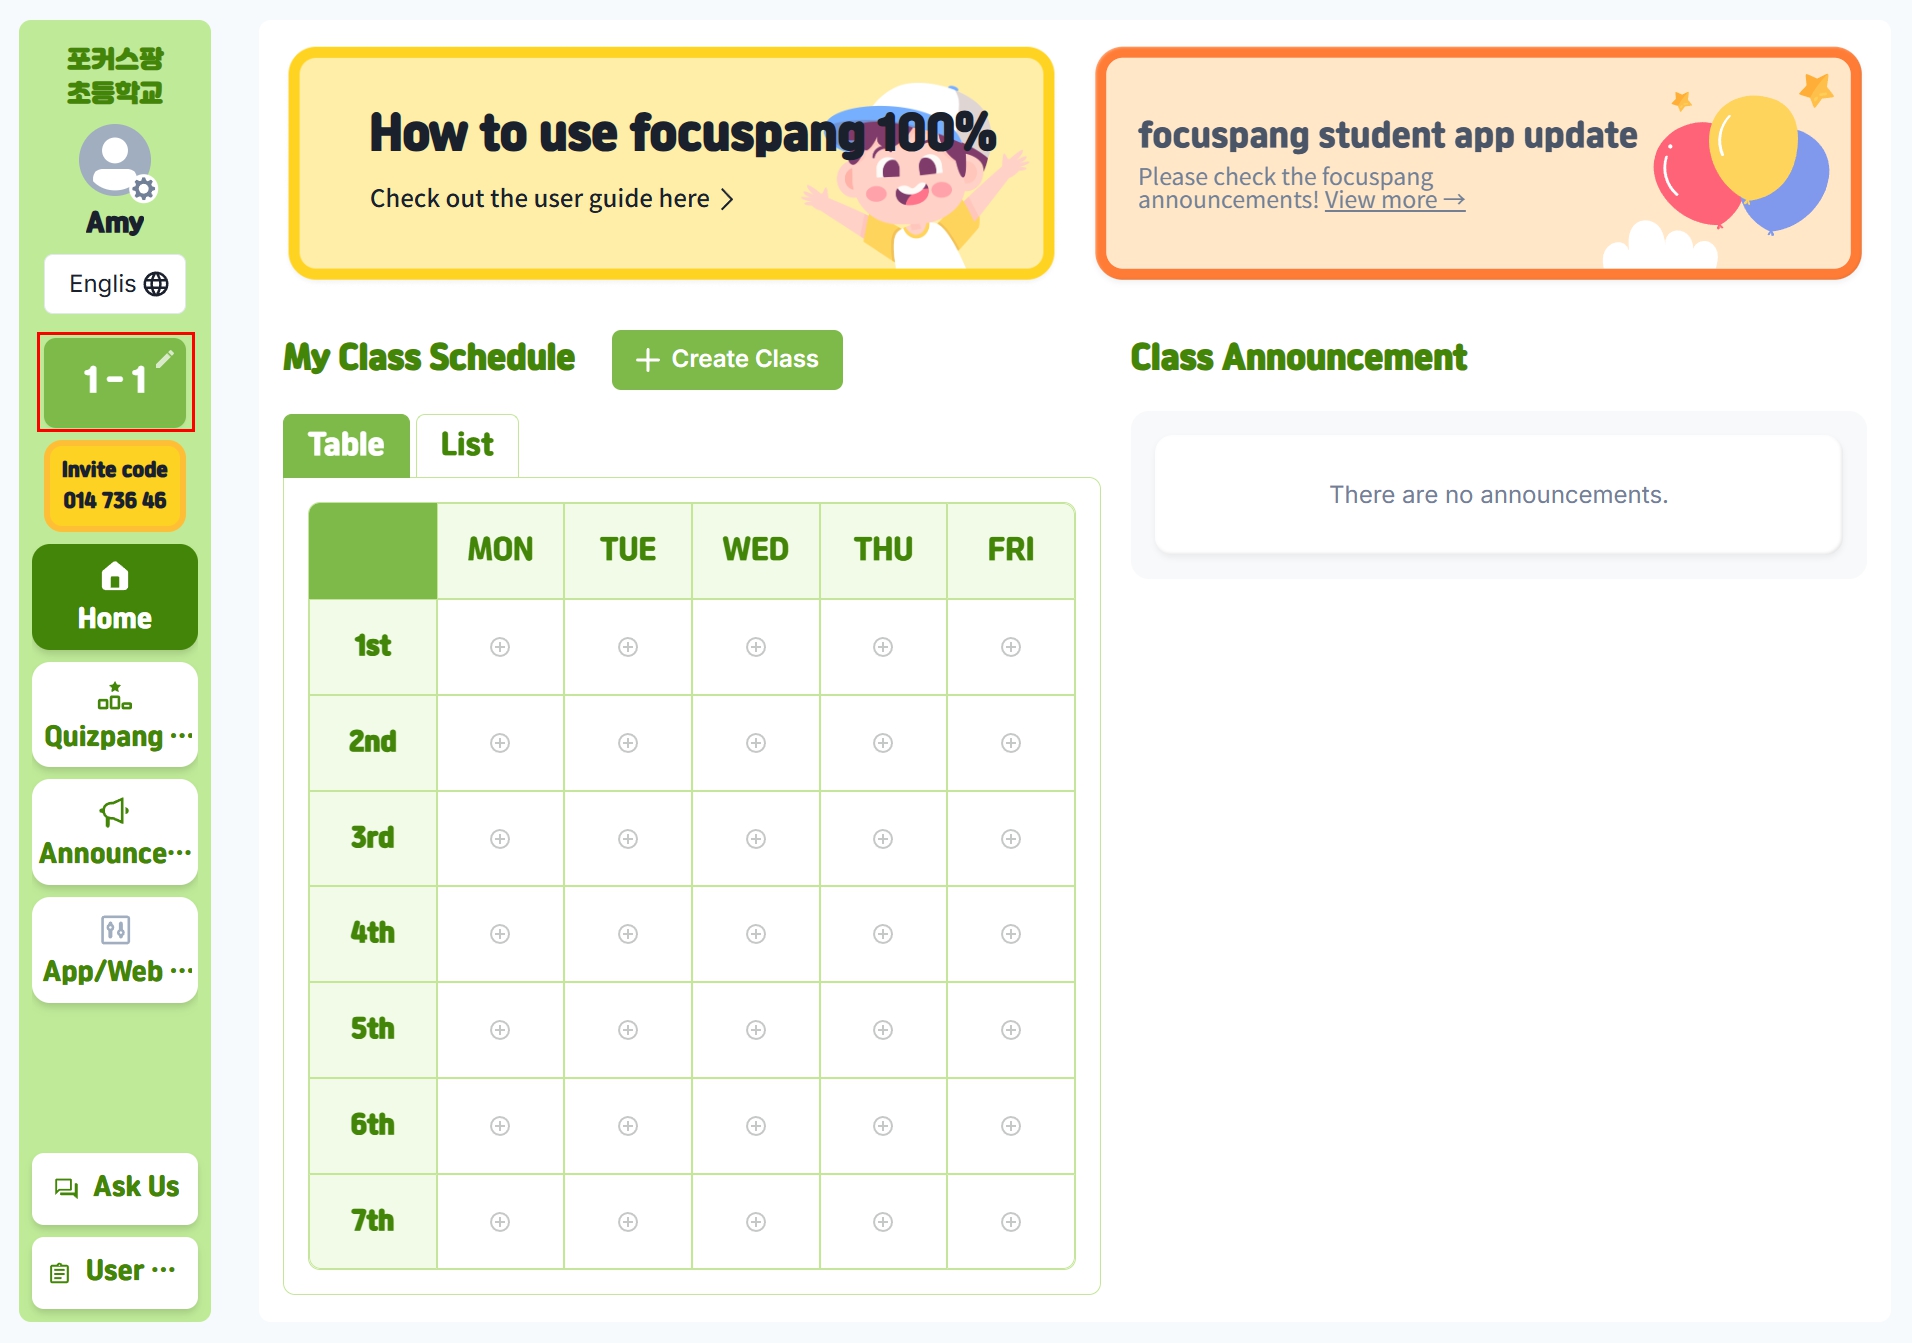
Step 2: Confirm your class
After creating the class, check that it appears at the top of the left menu.
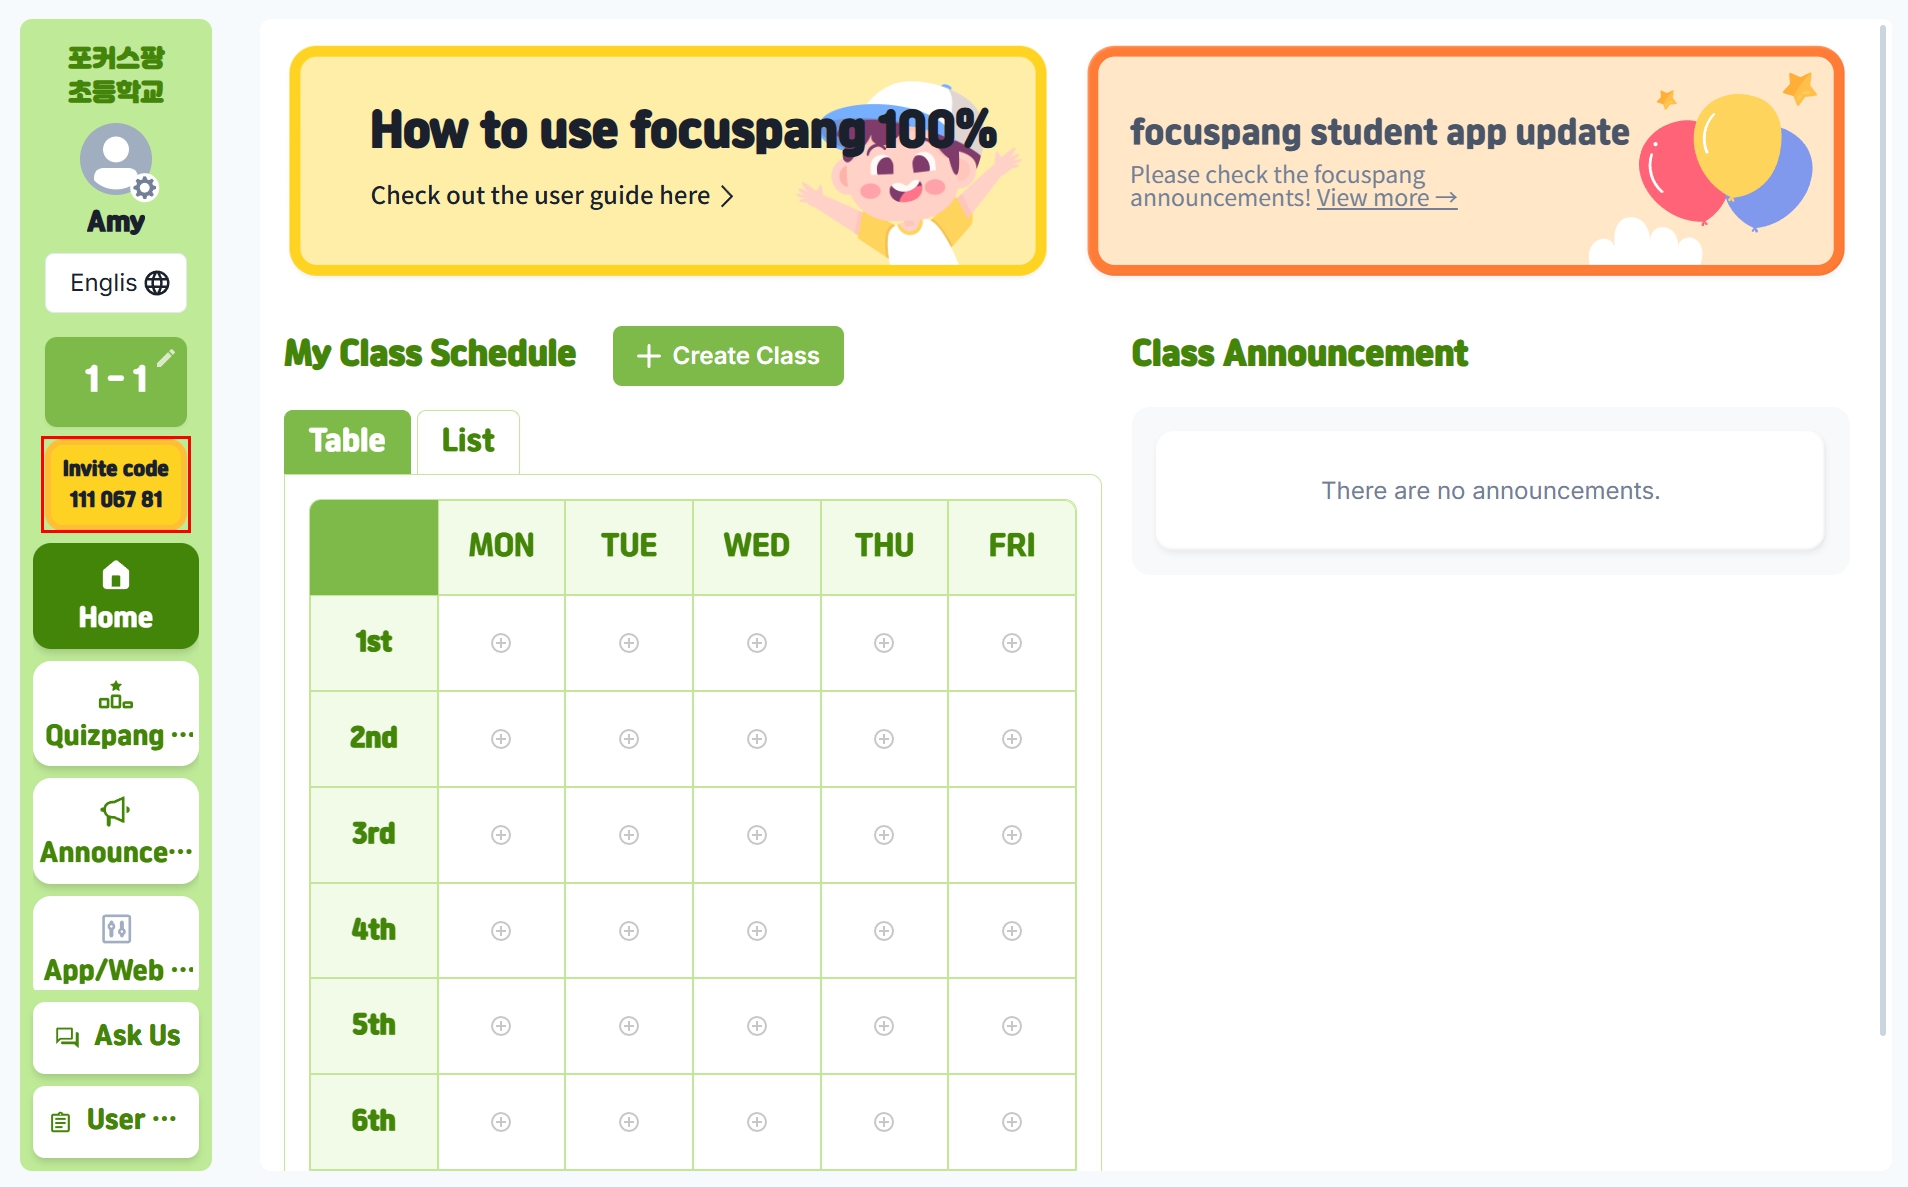
Step 3: Invite students
Once the class is created, an invite code is automatically generated. Students must enter this code to join the class.
What is an invite code?
- The invite code works like a password for students to enter your class.
- Students need to enter the invite code + student ID + name to join.
- For homeroom teachers, the same invite code is always used for that class, no matter which lesson you add.
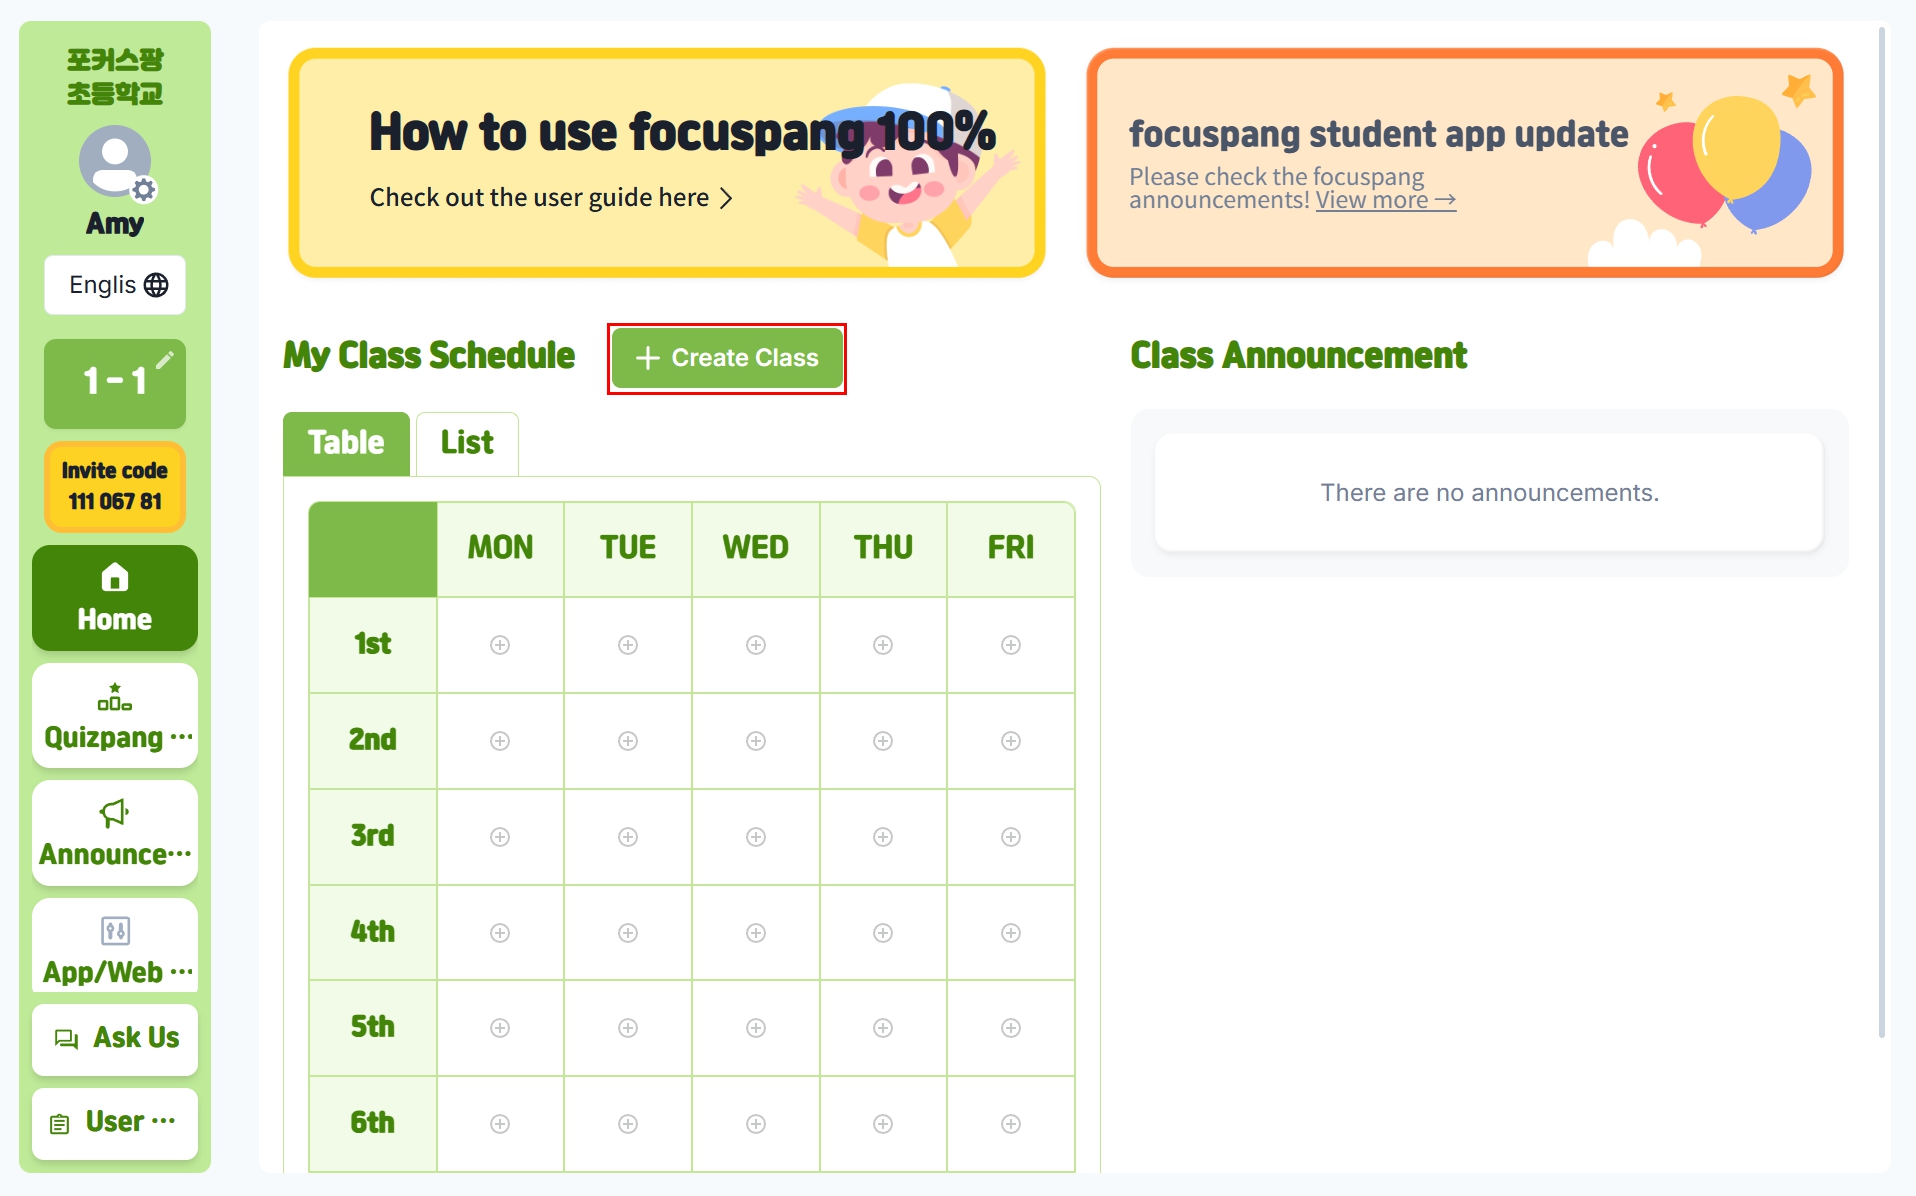
Adding a Lesson
Step 1: Click Add Lesson
On the timetable screen, click the [+ Add Lesson] button.
Step 2: Enter lesson information
In the pop-up, enter:
- Subject: e.g., Math, English
- Grade: the grade level
- Class: the class number
- Day: the day of the week
- Period: the lesson period
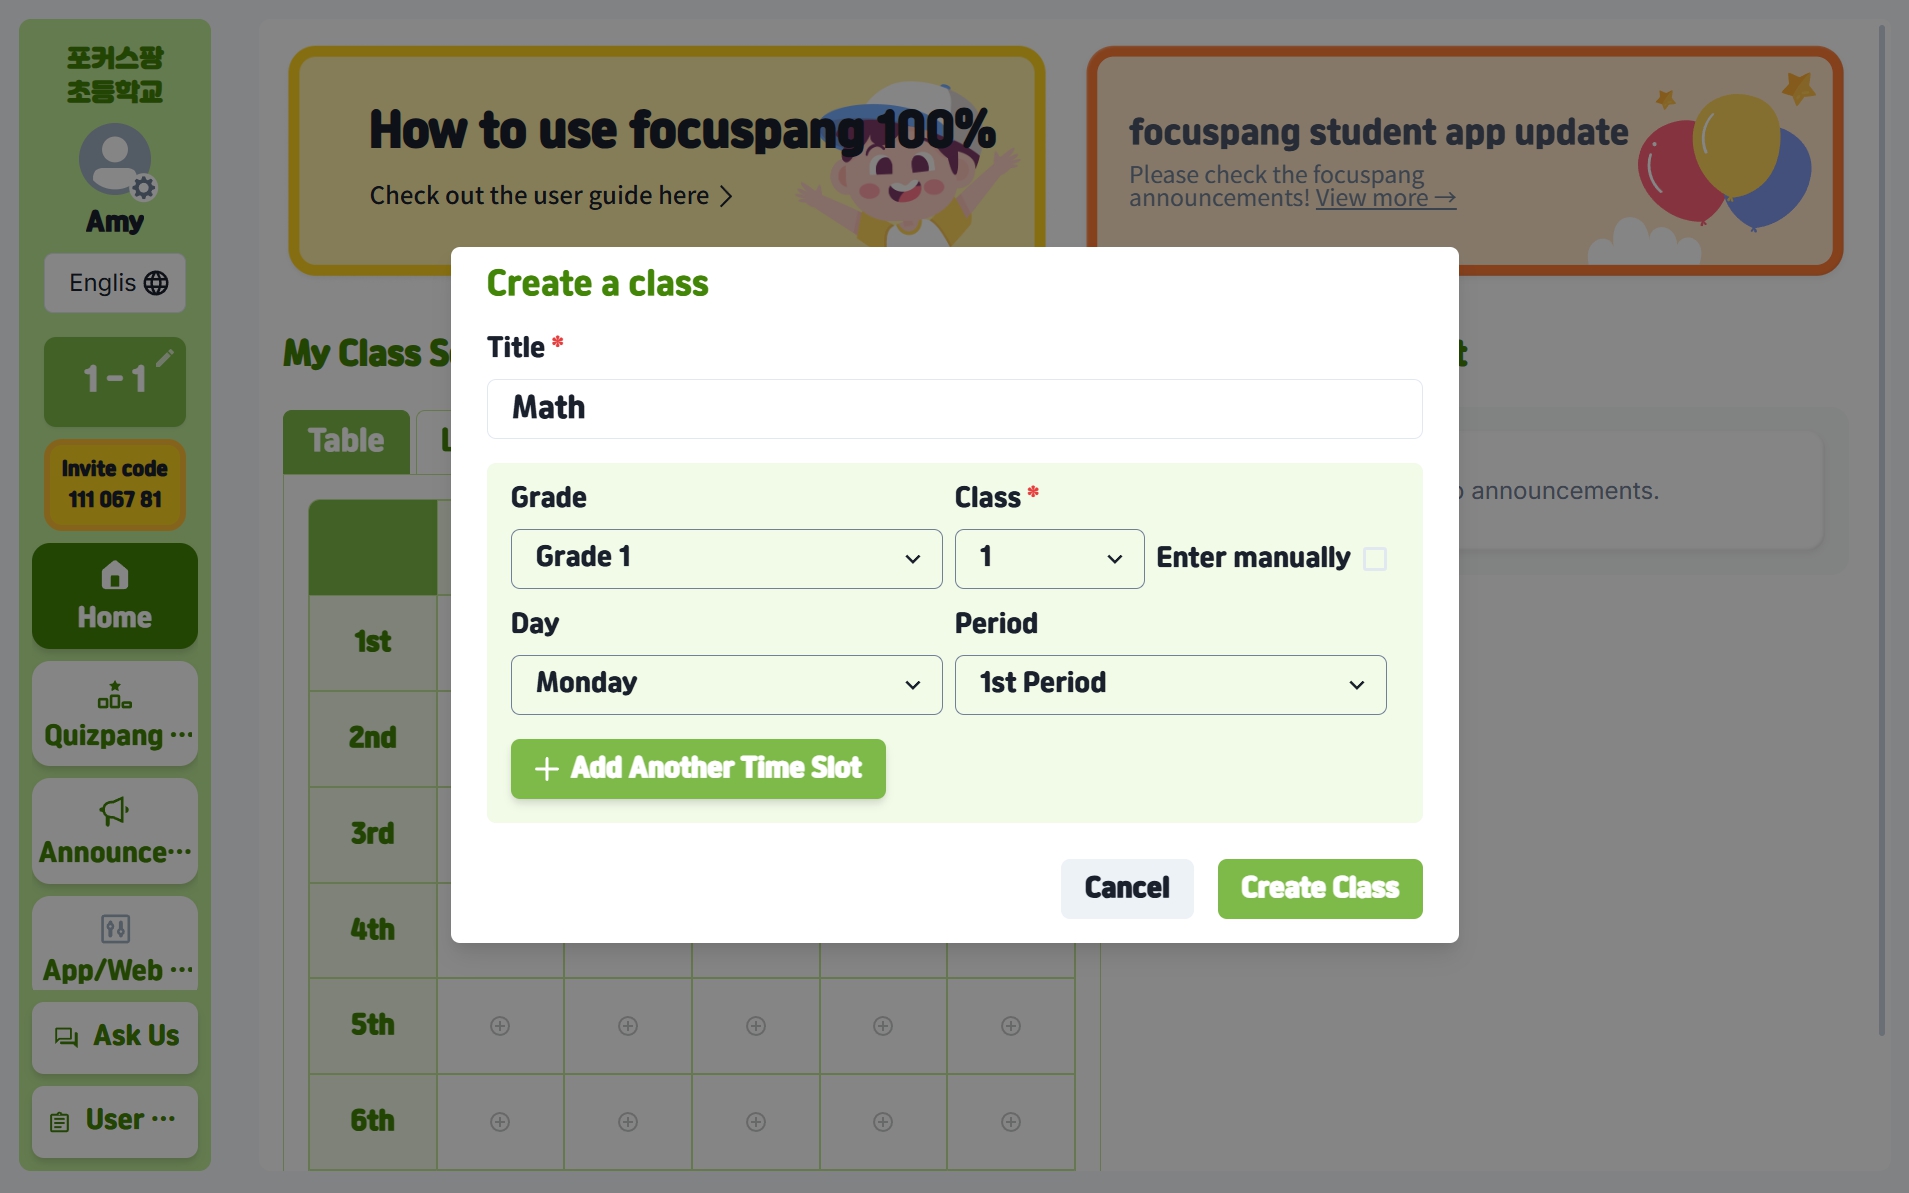
Step 3: Complete lesson creation
3Click the [Add Lesson] button to finish.
What if the same lesson is on multiple days?
Click [+ Add Lesson Time] to add multiple lessons at once.
Editing or Deleting a Lesson
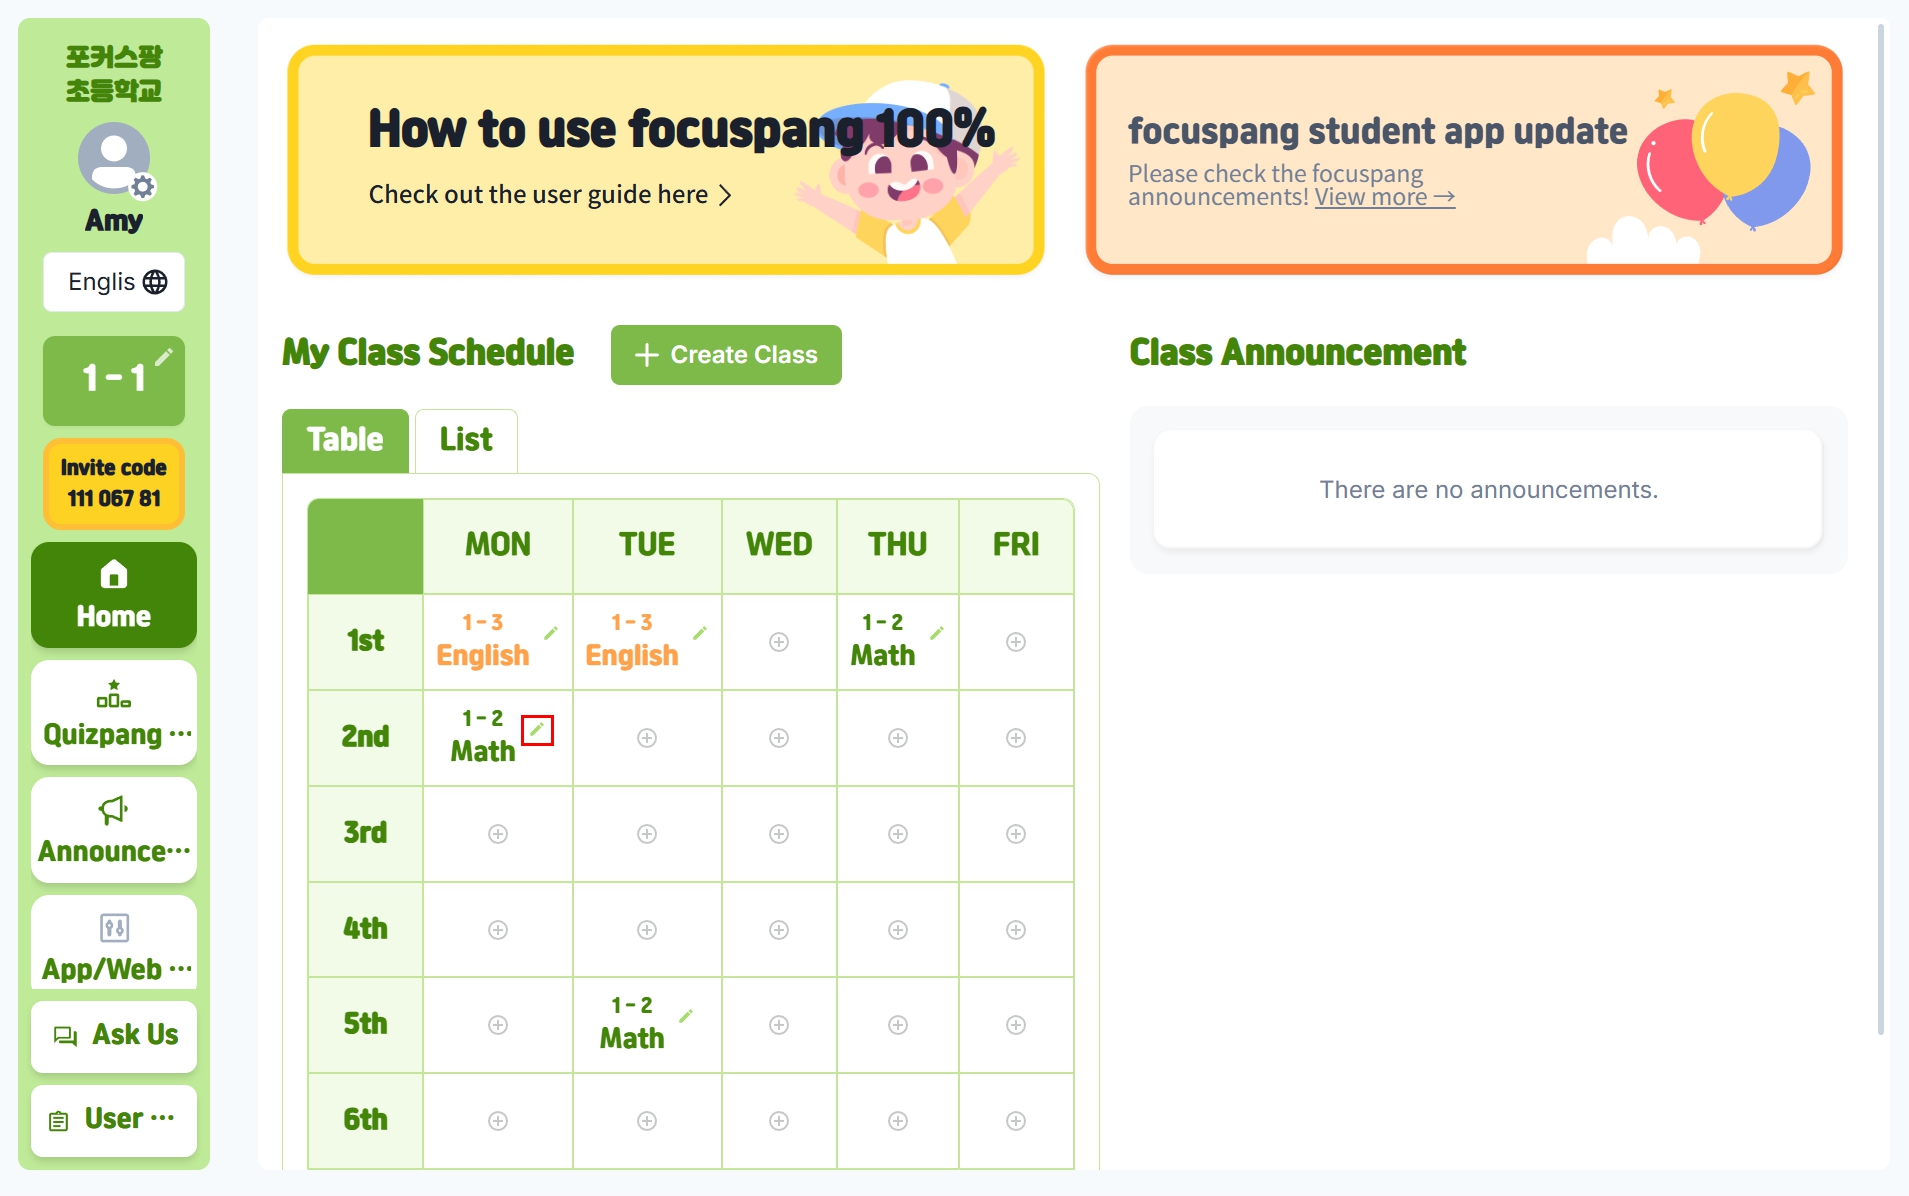
Step 1:Select the lesson
On the main timetable, click the ✏️pencil icon in the top right of the lesson.
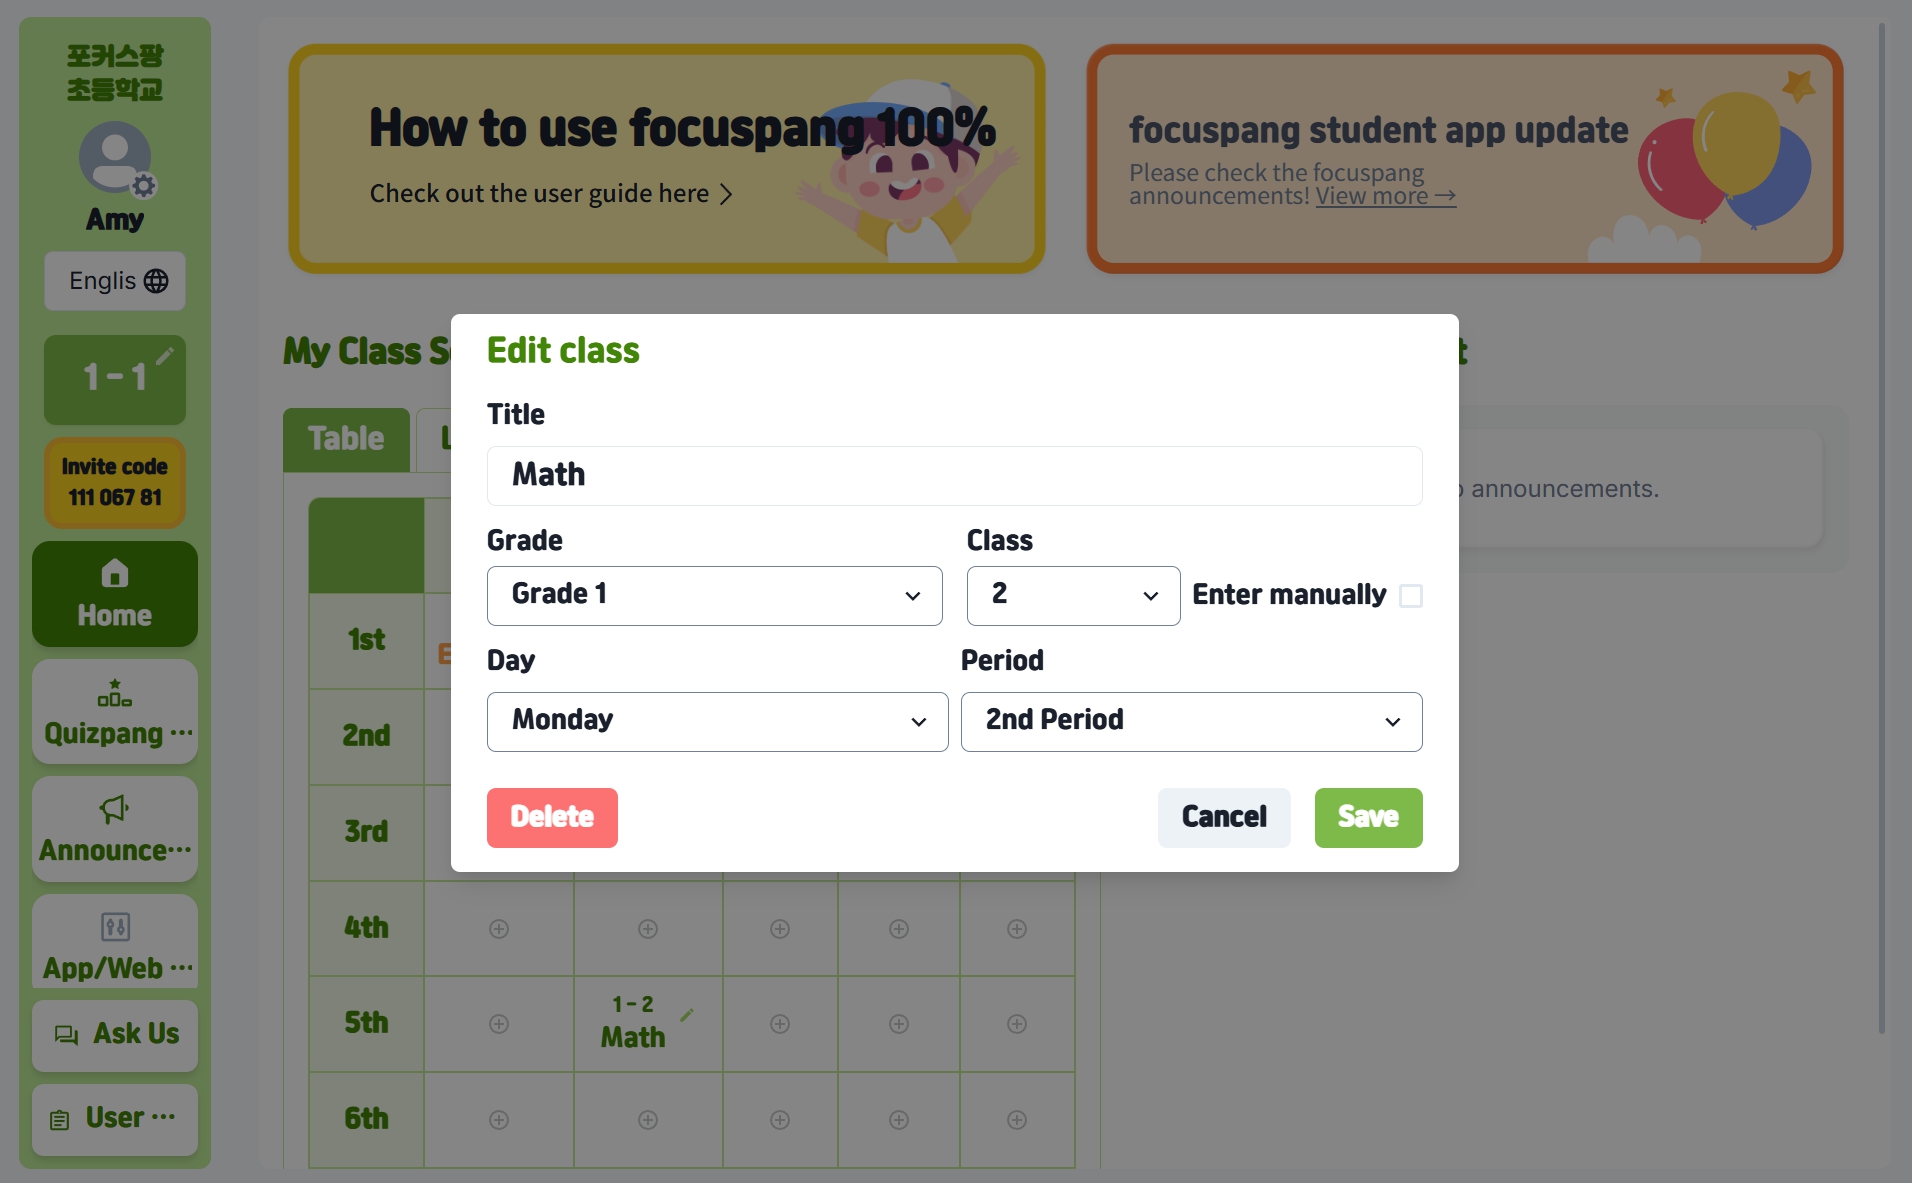
Step 2: Edit or delete
- Edit: Change the details, then click [Save]
- Delete: Click [Delete] to remove the lesson completely
Tips
- Update lesson times immediately if the schedule changes.
- Delete lessons you no longer teach.
- Use clear names students will understand.
If you run into problems
- Refresh the page.
- Log in again.
- Contact your school administrator.