Focus Time
📍 Class Schedule → Click your class in the timetable → Click [Focus Time] in the left menu
Focus Time is the live class mode. You can share your screen, see student screens, lock screens, share materials and block distracting websites and apps during class.
Starting Focus Time
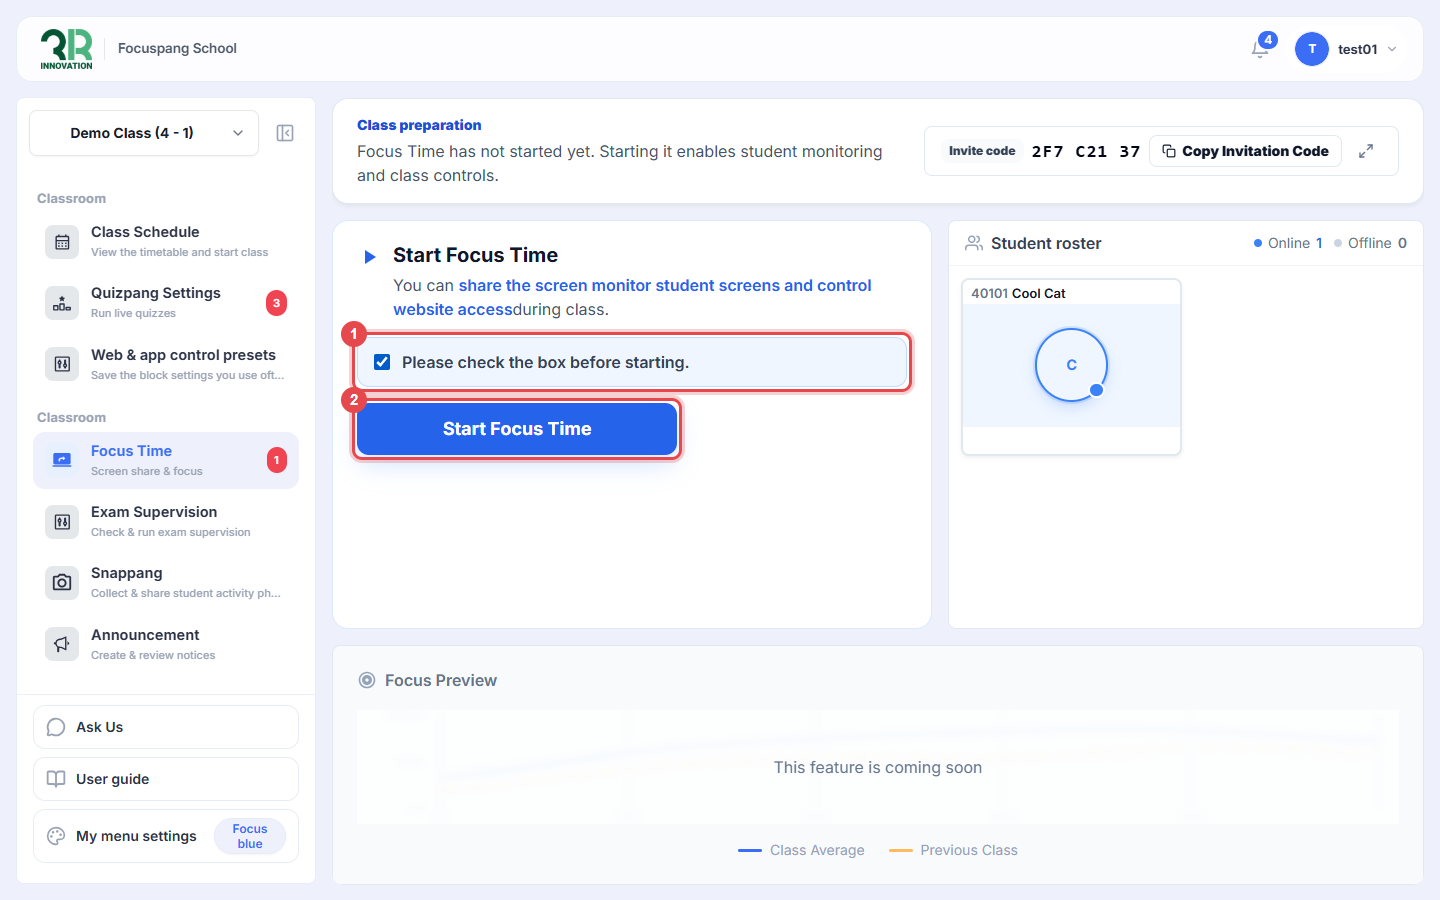
Step 1: Check the box and start
Check Please check the box before starting. ①, then click [Start Focus Time] ②. The Student roster on the right shows which students are online.
Step 2: Confirm
In the Start Focus Time pop-up, click [Start Focus Time].
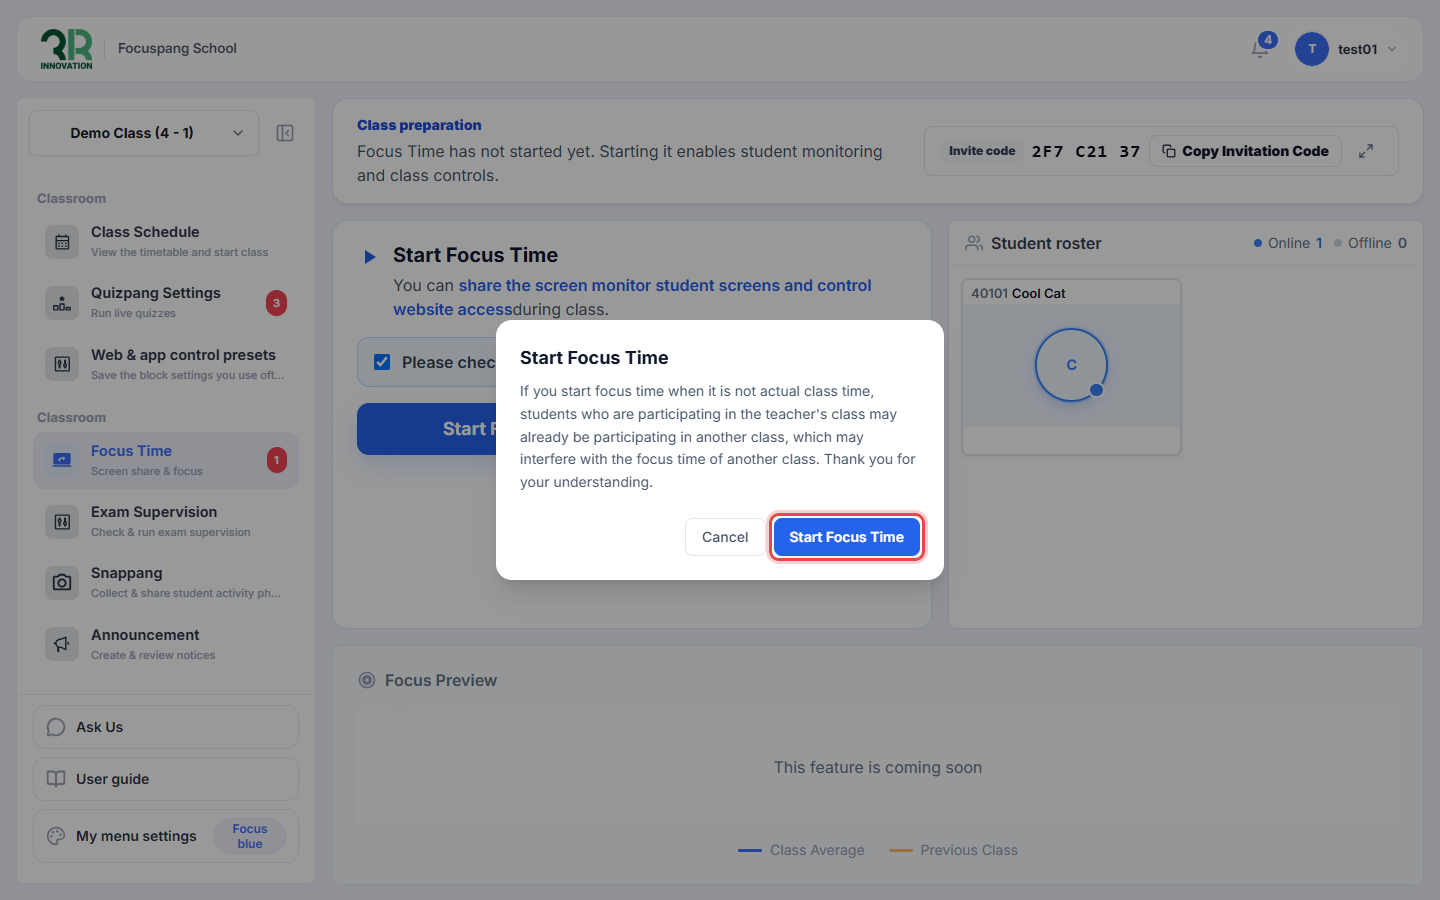
When Focus Time begins, it immediately affects all students in the class. Start it only during the actual class time so you don’t interrupt students who may be in another class.
Class tools
During Focus Time, the class is shown as In Class at the top of the left menu, and the class page is locked (Cannot leave during Focus Time). The toolbar is at the bottom of the board and the student screens are on the right.
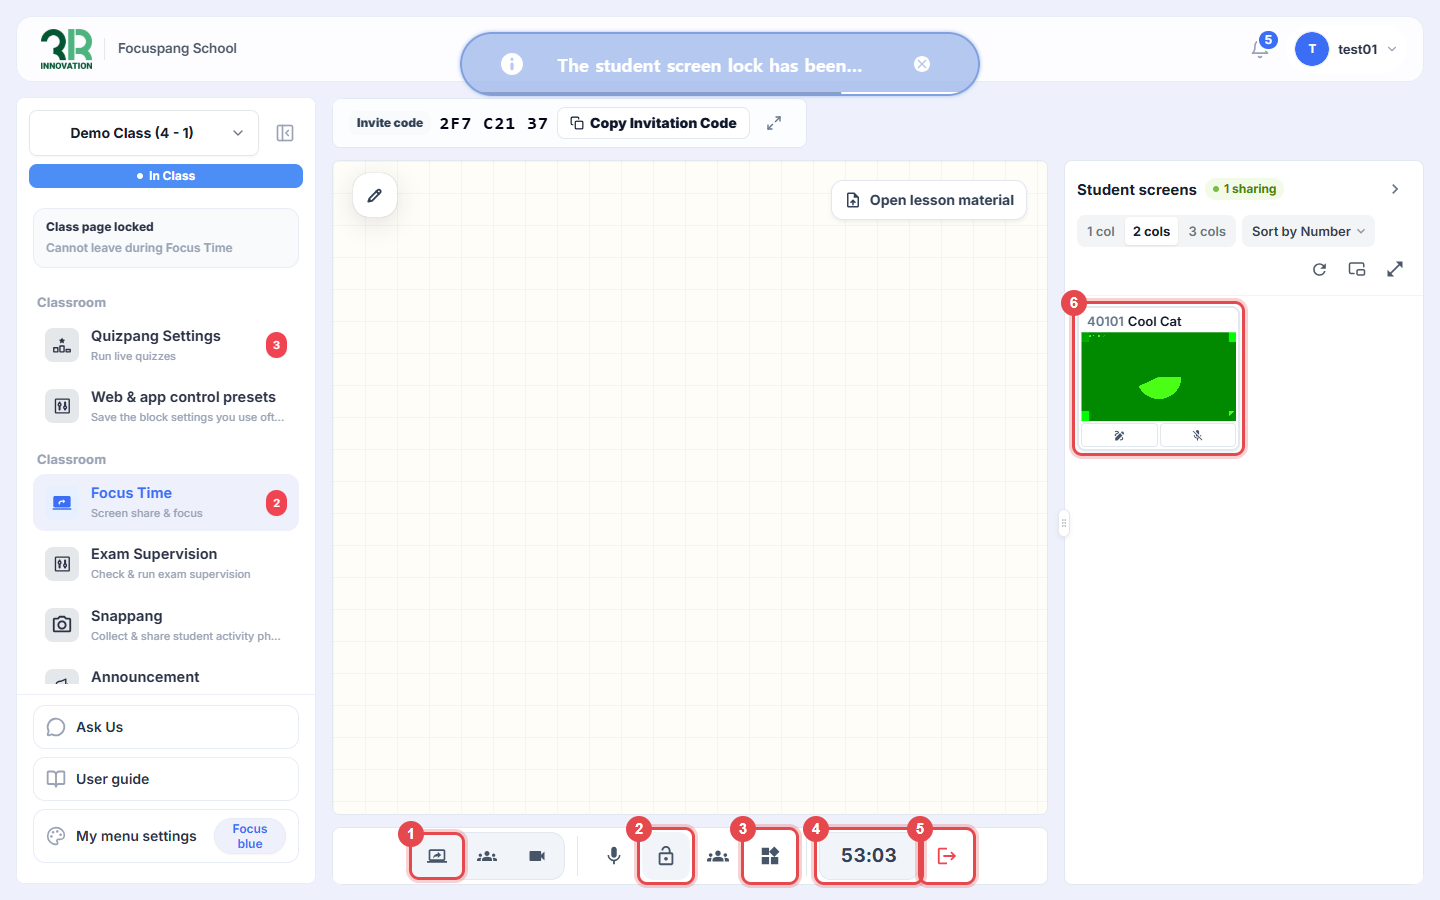
- Share your screen: Share your screen with the class.
- Lock screens: Lock or unlock all student screens.
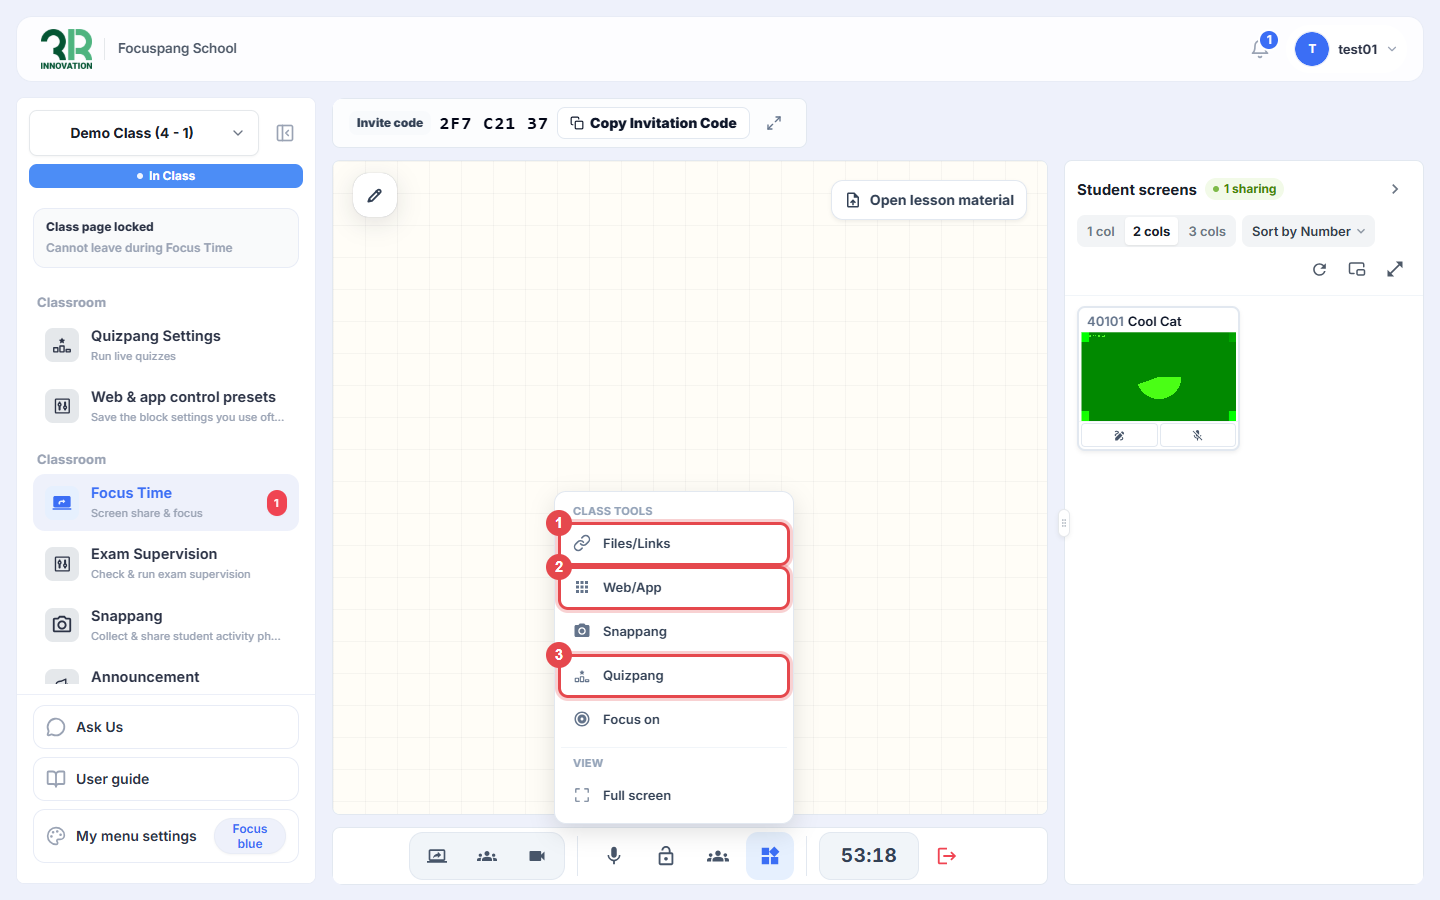
- Tools: Share files and links, block websites and apps, or start a quiz.
- Class timer: Shows the time of the current class.
- End class: End Focus Time.
- Student screens: See each student’s screen live. Choose 1, 2 or 3 columns, or sort by number.
Click the ✏️ pencil button at the top left of the board to write on the board.
If the student’s browser asks to share the screen or camera, the student should choose Allow. The student’s screen then appears in Student screens.
Lock student screens
Click the 🔒 lock button ②. Every student screen turns dark with the message “Eyes on your teacher for a moment”. Click the button again to unlock.
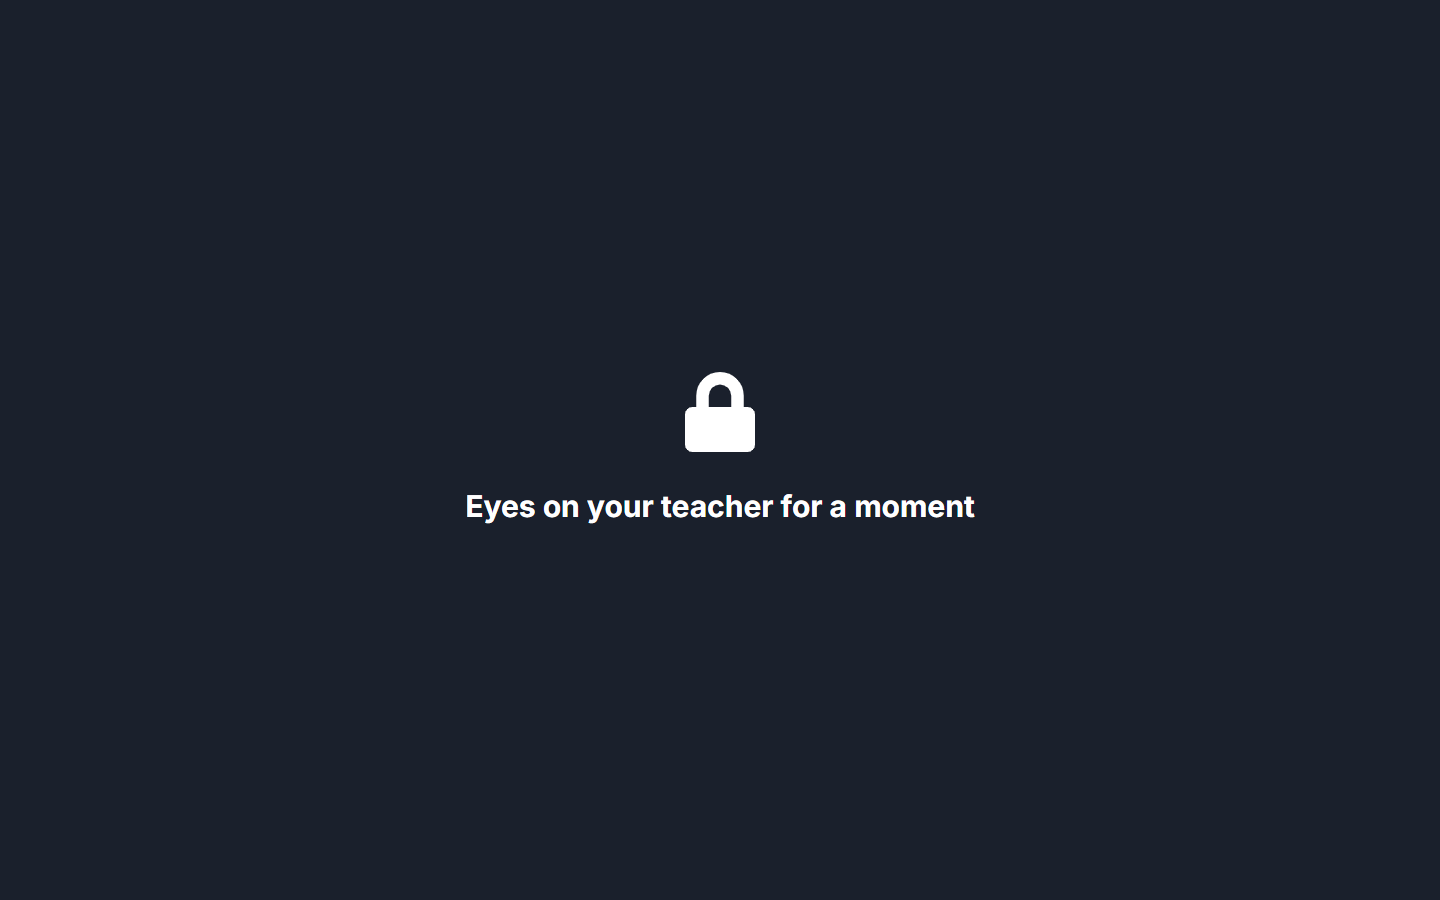
Screen lock is not available on iPad.
Share files and links
- Click Tools (③ on the toolbar) and choose [Files/Links] ①.
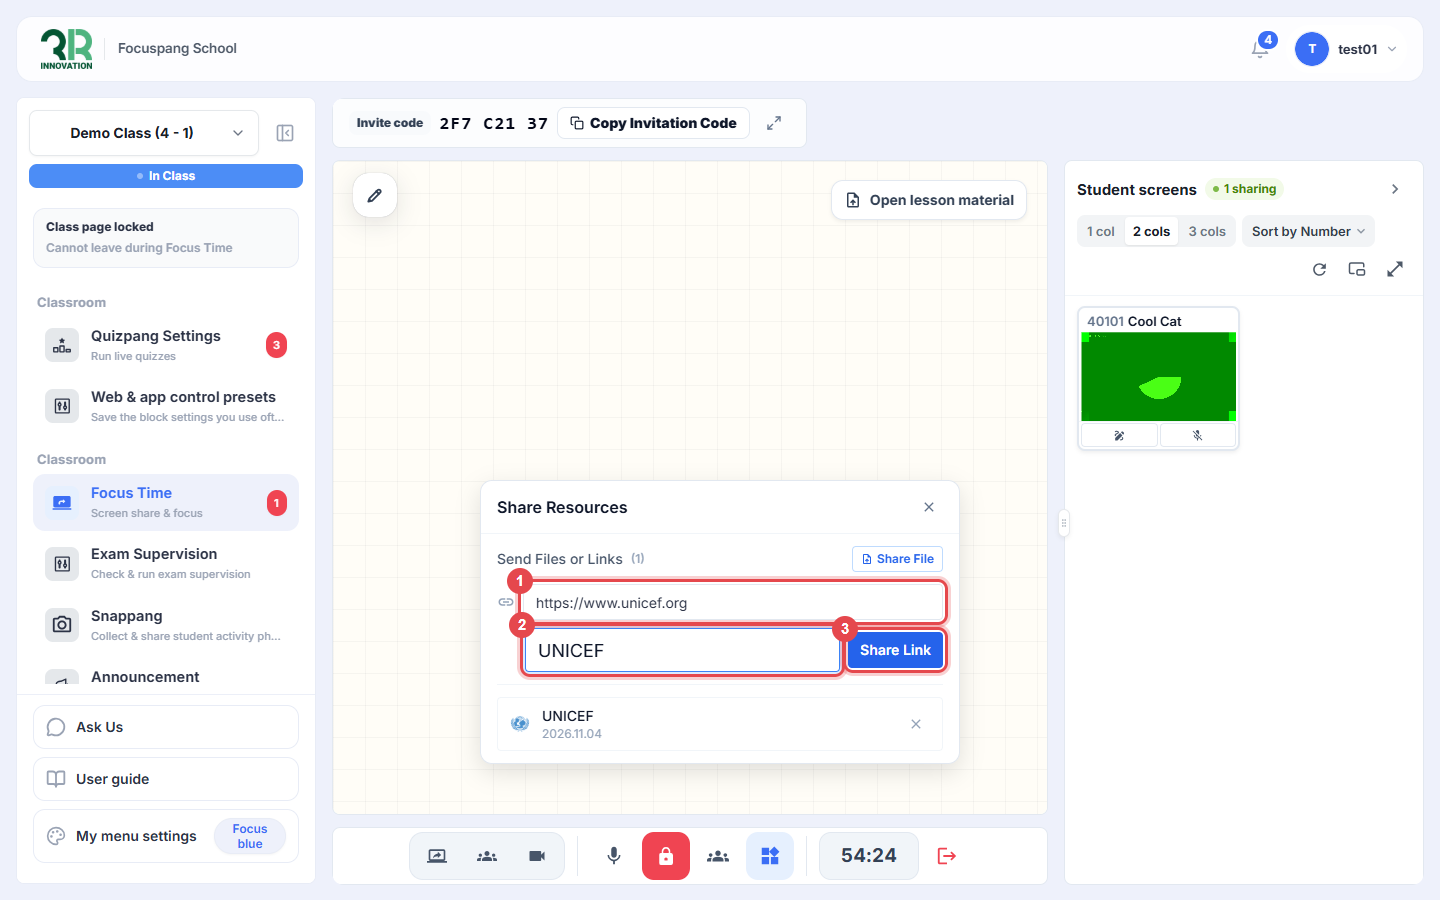
- In Share Resources, paste a web address ①, give it a title ② and click [Share Link] ③. To share a file, click [Share File].
- The link appears right away in Shared materials at the bottom of every student screen.
Block websites and apps
Click Tools (③ on the toolbar) and choose [Web/App] ②. Open a category to see which websites and apps are blocked during class. The Use app blocking switch turns app blocking on or off.
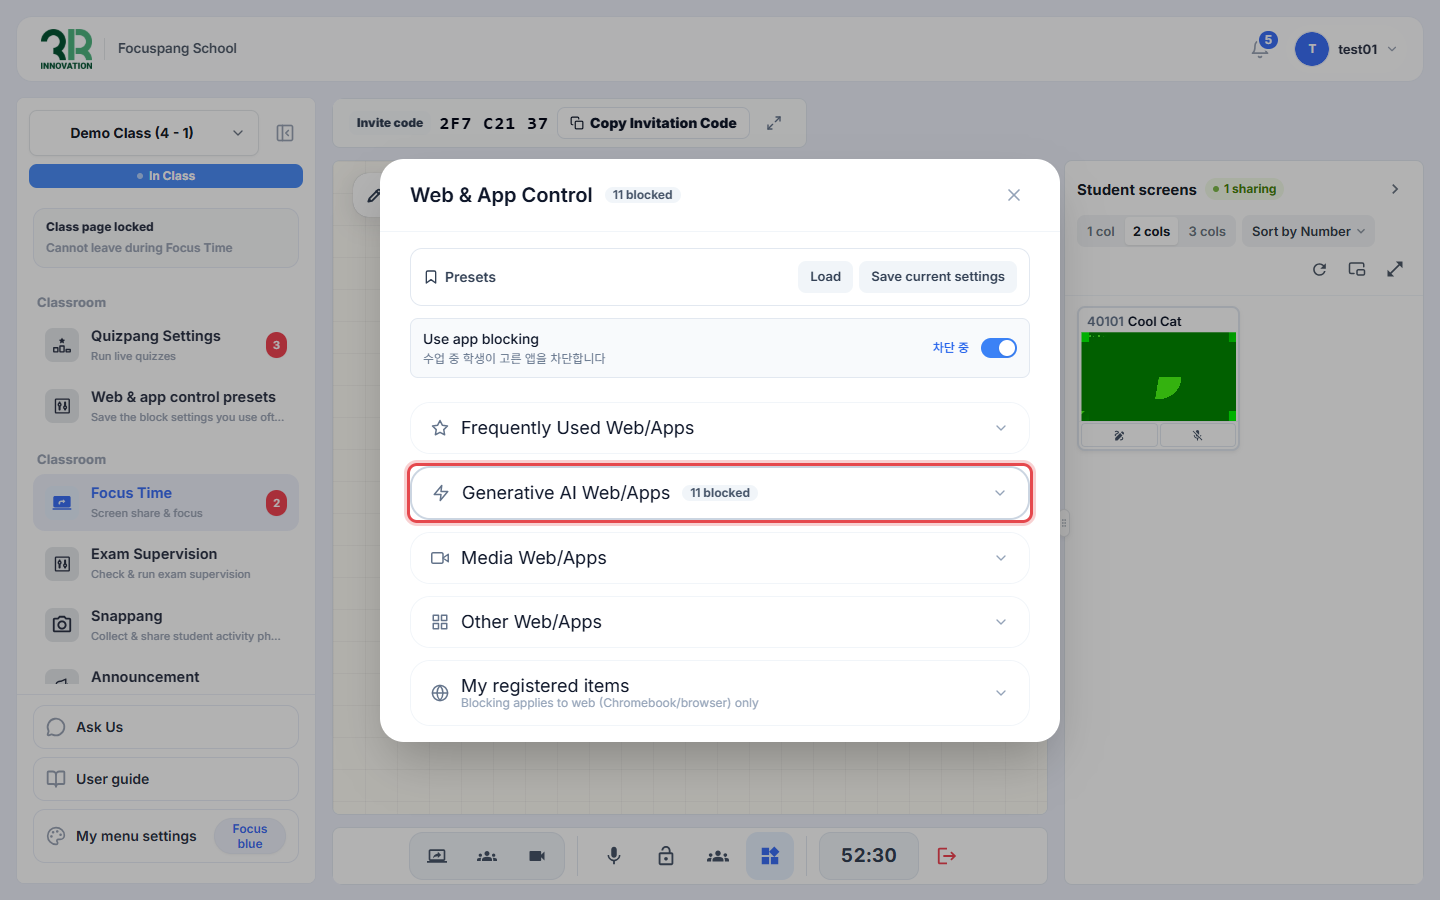
- Presets: Click [Save current settings] to save your usual settings as a preset, and [Load] to apply a saved preset. You can also manage presets in Web & app control presets in the left menu.
- My registered items: Websites you add yourself. This applies to websites only (Chromebook/browser).
Blocking works on Mac, Windows, Chromebook and Android. It is not available on iPad.
End the class
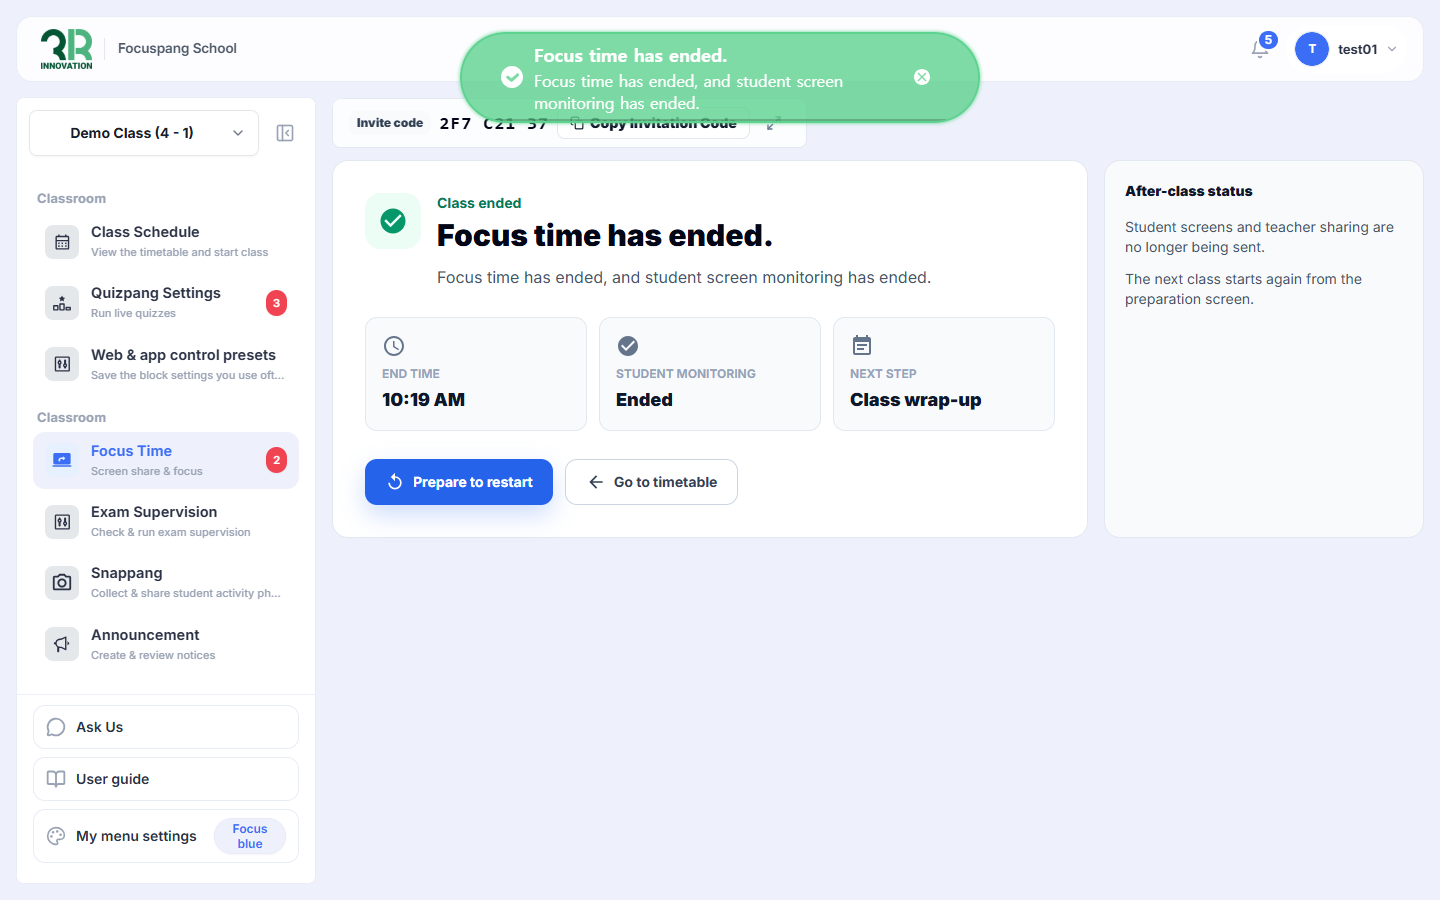
Click the exit button ⑤, then click [End Class]. Screen sharing and all student connections end, and students return to their timetable.
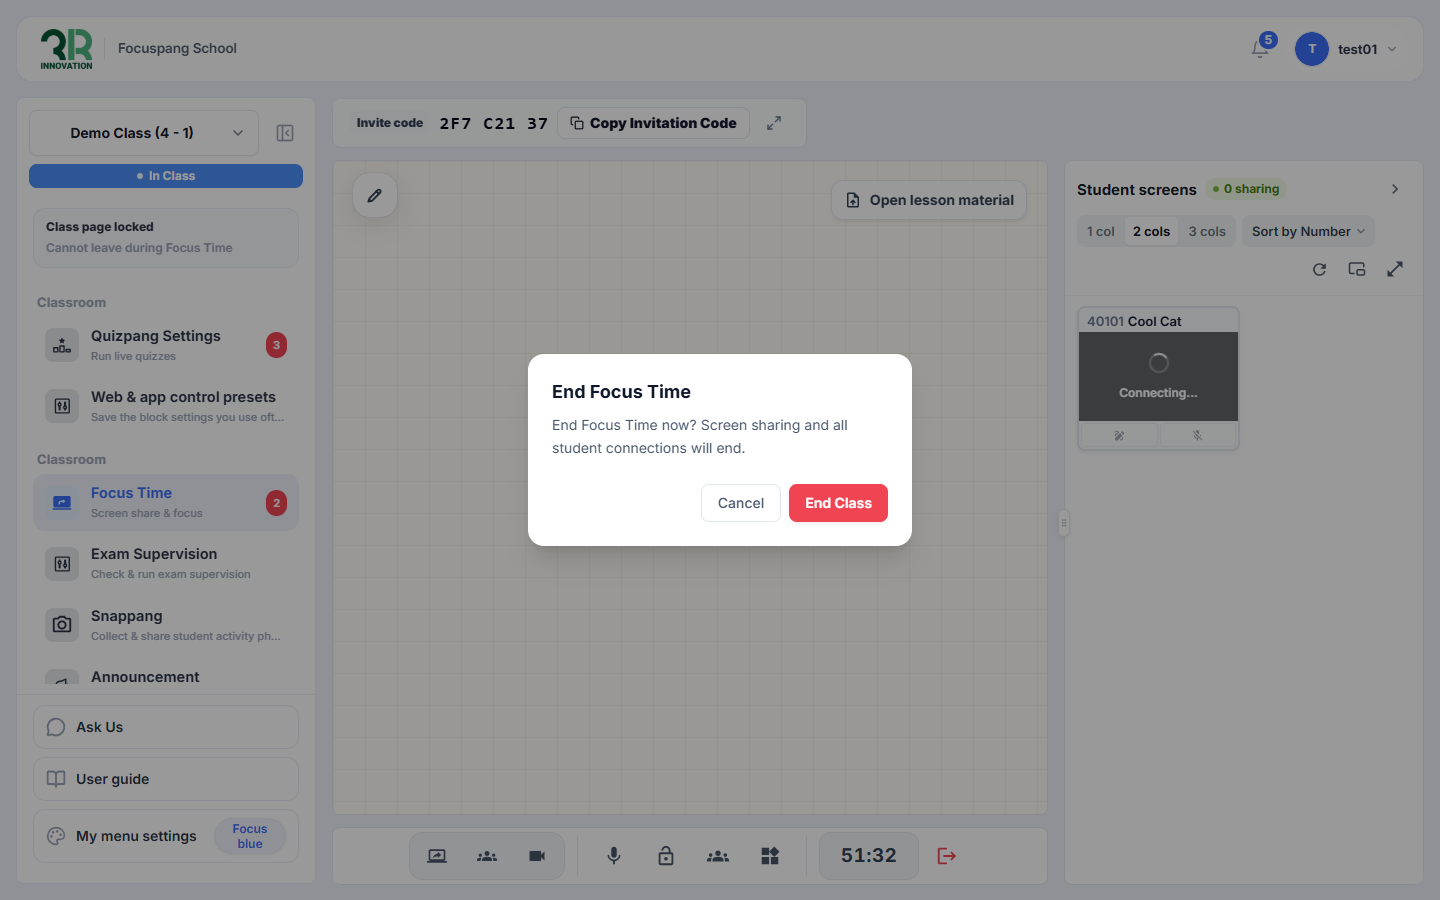
When the class ends, you can click [Prepare to restart] to start again or [Go to timetable].