2. Create a Class
Once you’ve logged in, you can now set up your timetable for digital lessons.
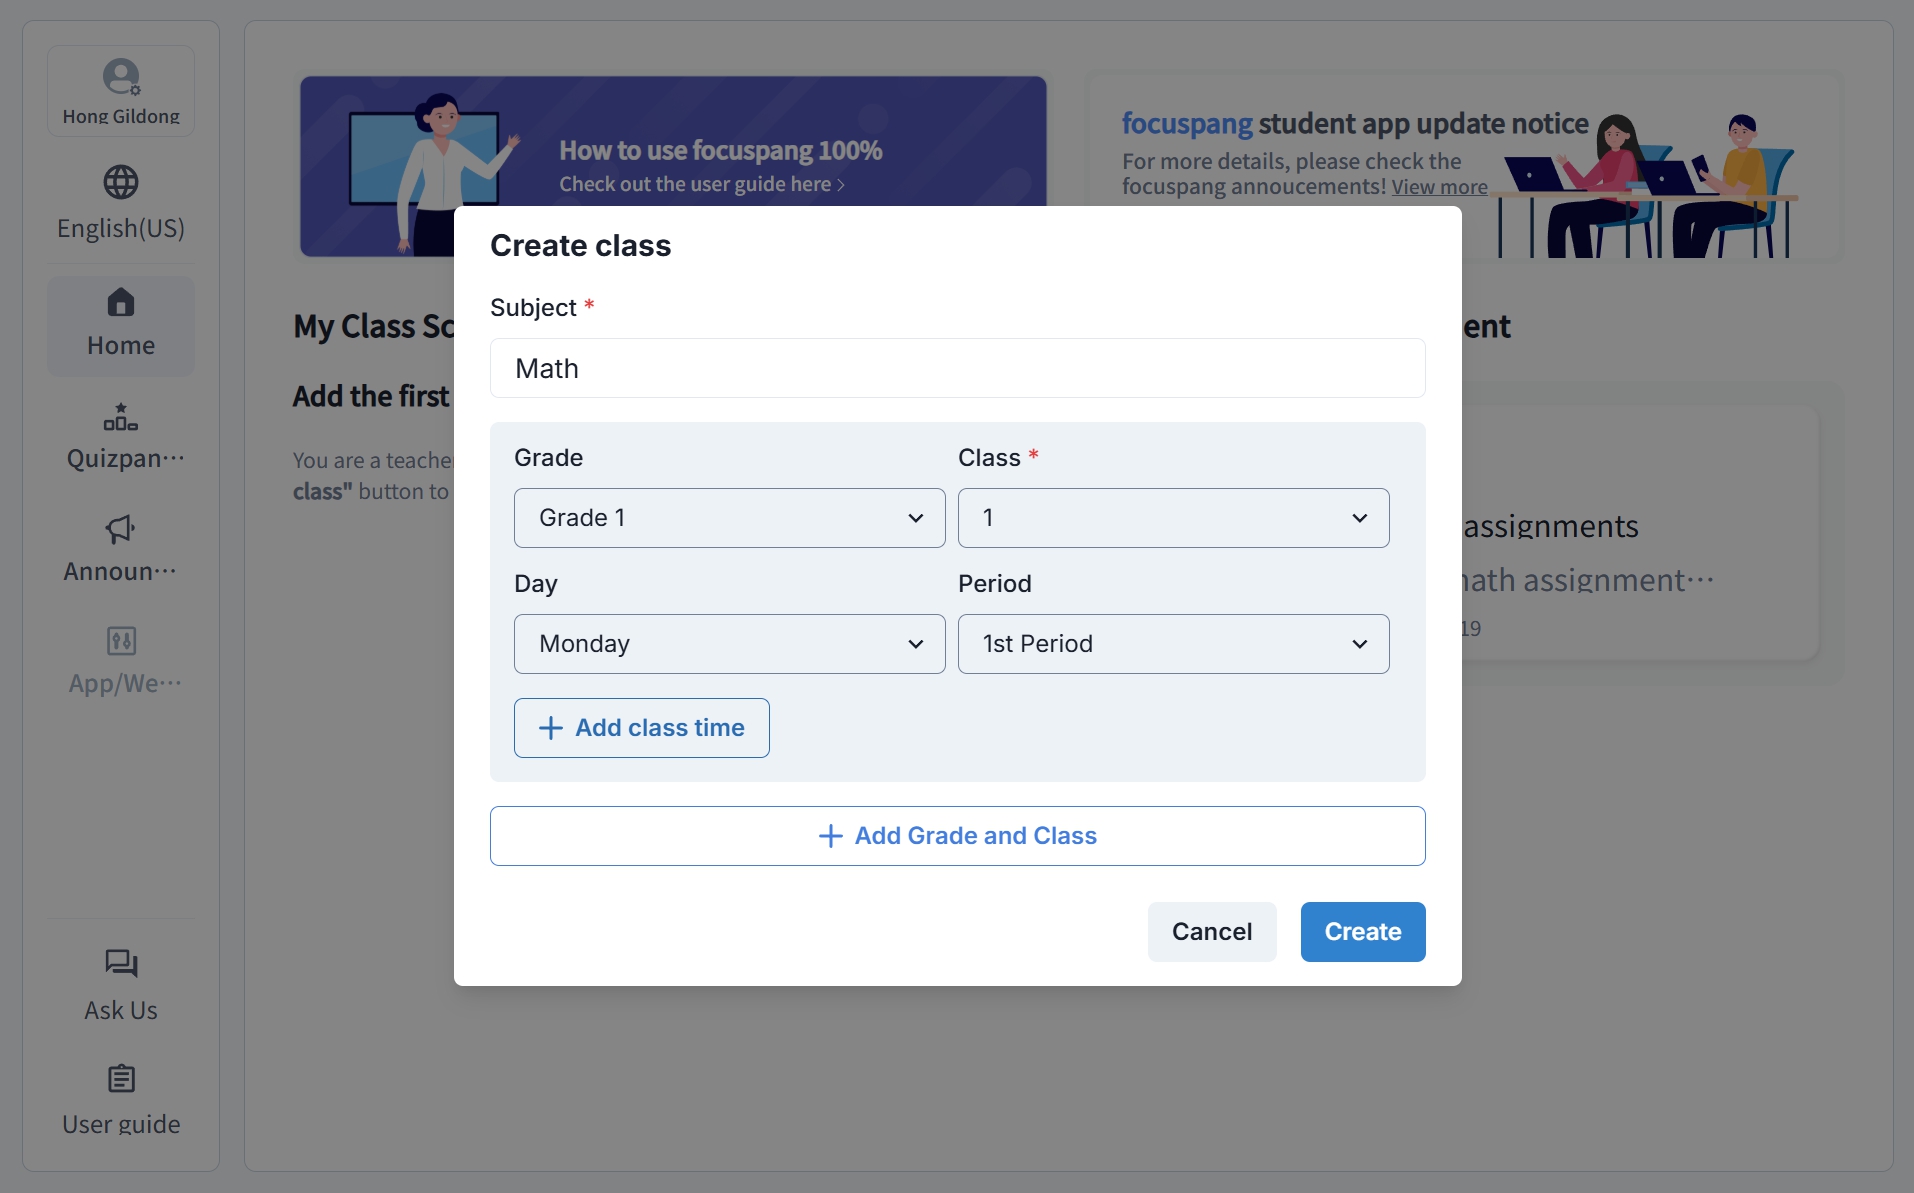
Add a Class
Step 1: Start Adding a Class
Click the [+Add Class] button in your schedule.

Step 2: Enter class information
In the pop-up window, fill in the following details:
- Subject: e.g., Korean, Math, English
- Grade: the grade level
- Class: the class number
- Day: the day of the week
- Period: the lesson period
Efficient Class Management
Add Multiple Time Slots
If you want to add the same subject on different days or times, click the [+ Add Class Time] button to add several lessons at once.
Add Classes for Other Grades/Classes
If you’re teaching multiple grades, click the [+ Add Other Grade] button to include their classes.
Don’t worry—any class you entered incorrectly can be deleted at any time!
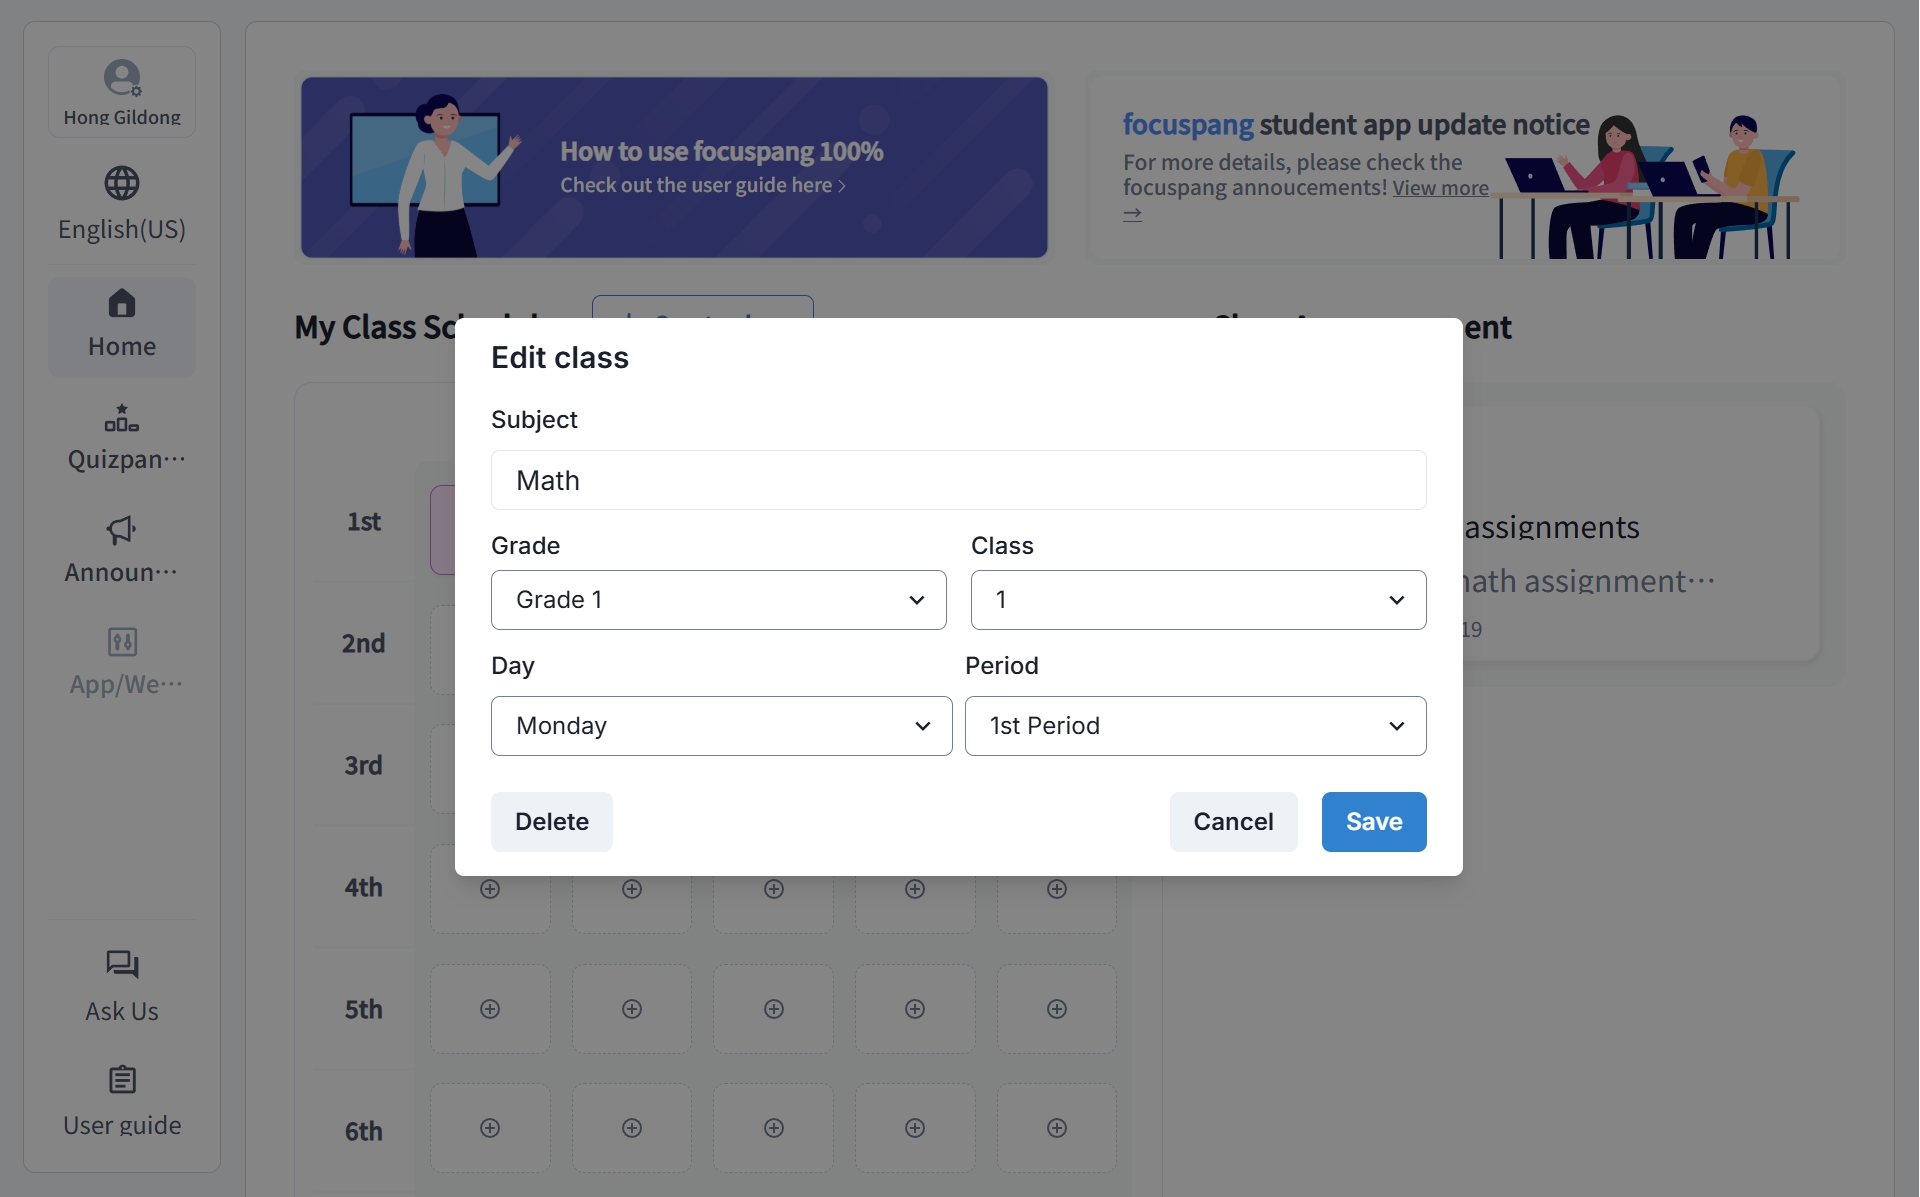
Edit or Delete a Class
Step 1: Select the Class to Edit
On the main timetable, click the ✏️pencil icon in the upper-right corner of the class you want to change.

Step 2: Edit or Delete Information
- Edit: Make your changes and click [Save].
- Delete: Click [Delete] to completely remove the class.
tip
- Update immediately if the class schedule changes.
- Delete classes you no longer teach.
- Use clear names so students can easily recognize the class.
Troubleshooting
- Refresh the page.
- Try logging in again.
- Contact the school administrator if the problem persists.